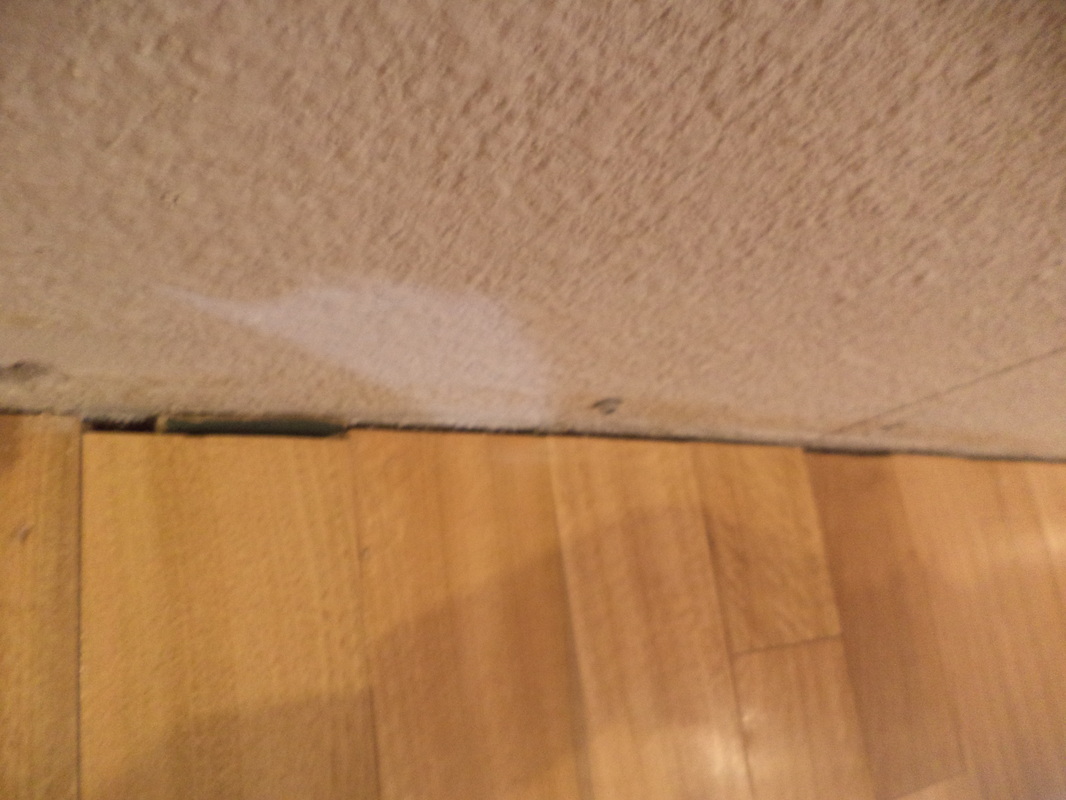
Cuando nos colocaron el piso de madera ( ver aquí) nos quedó pendiente la colocación de zócalos. El piso es hermoso (aunque admito que en un principio yo quería e insistía en que fuera de color “marrón” y resulta que el más barato era rosado) y produjo un cambio abismal en cómo percibíamos la casa, pero esas terminaciones desparejas en el encuentro con las paredes piden a gritos una terminación pareja. When we had the wooden floor laid (see here), the baseboards were not included. The floor is beautiful (although I admit that at first I wanted a brown-wooden floor but it turned out we could afford the pinkish one we have) and it made a huge difference in the way we felt in the house, but the uneven finishing is begging for an upgrade. De alguna manera el ojo ya se nos estaba acostumbrando a esa desprolijidad, pero el día llegó y dijimos ¡basta! Así que salimos a buscar zócalos y ¡encontramos una maderera que vendía zócalos de eucalipto, que es la misma madera que nuestro piso! Eso sí que fue una gran felicidad, porque ya pensábamos que íbamos a tener que buscar una madera similar, pero encontrar la misma, ¡es mucho mejor!
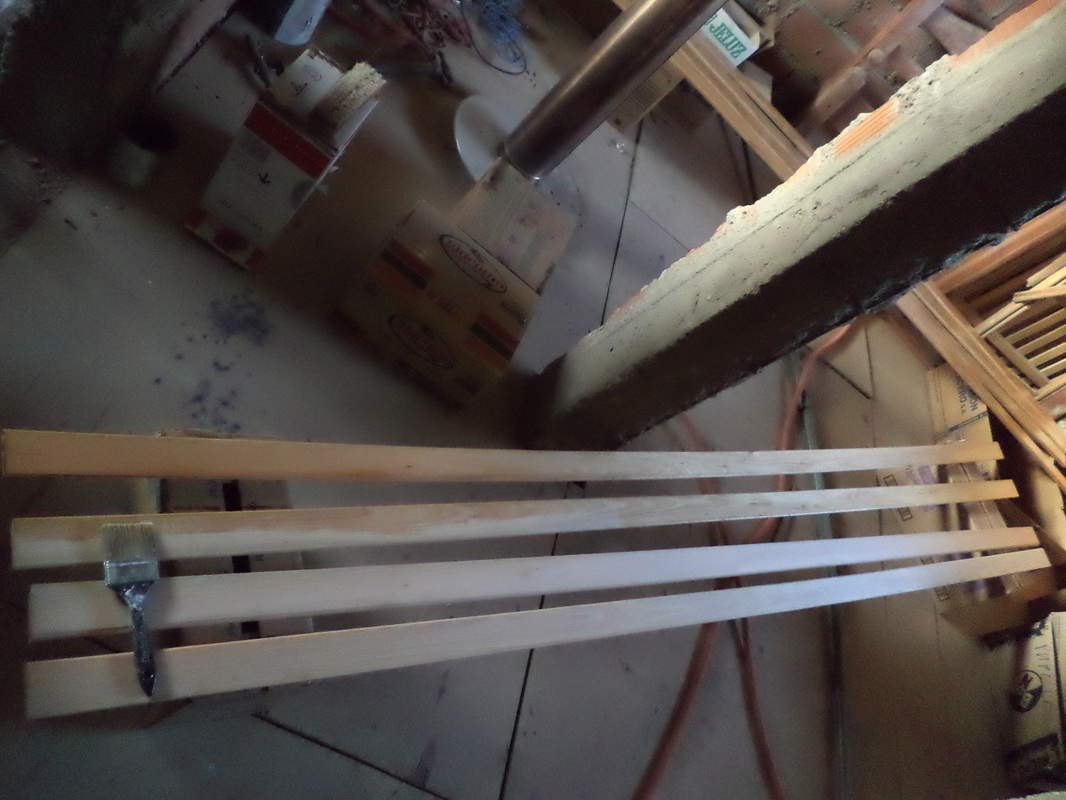
Tendría que haber sacado la foto de cómo trasladamos los zócalos hasta casa: en el techo del auto con los extremos de los zócalos asomando adelante y atrás,¡ y eso que eran 3 metros de largo!
Después le dimos 2 capas de barniz mate incoloro. Hasta acá, ninguna dificultad.
In some way our eyes were already being used to see this uneven finishing, but the day came when we said enough is enough! So we went looking for the appropriate baseboards and we found a shop that sold eucalyptus baseboards, the same type of wood as our flooring! That was a big hit, because we thought we would have to use a similar wood, but having the same type of wood is even better!
I should’ve taken a photo of our car loaded with the baseboardss: they were 3 meters long hanging from our roof the entire way home.
After that we painted 2 coats of colorless varnish. Very easy up to this point.
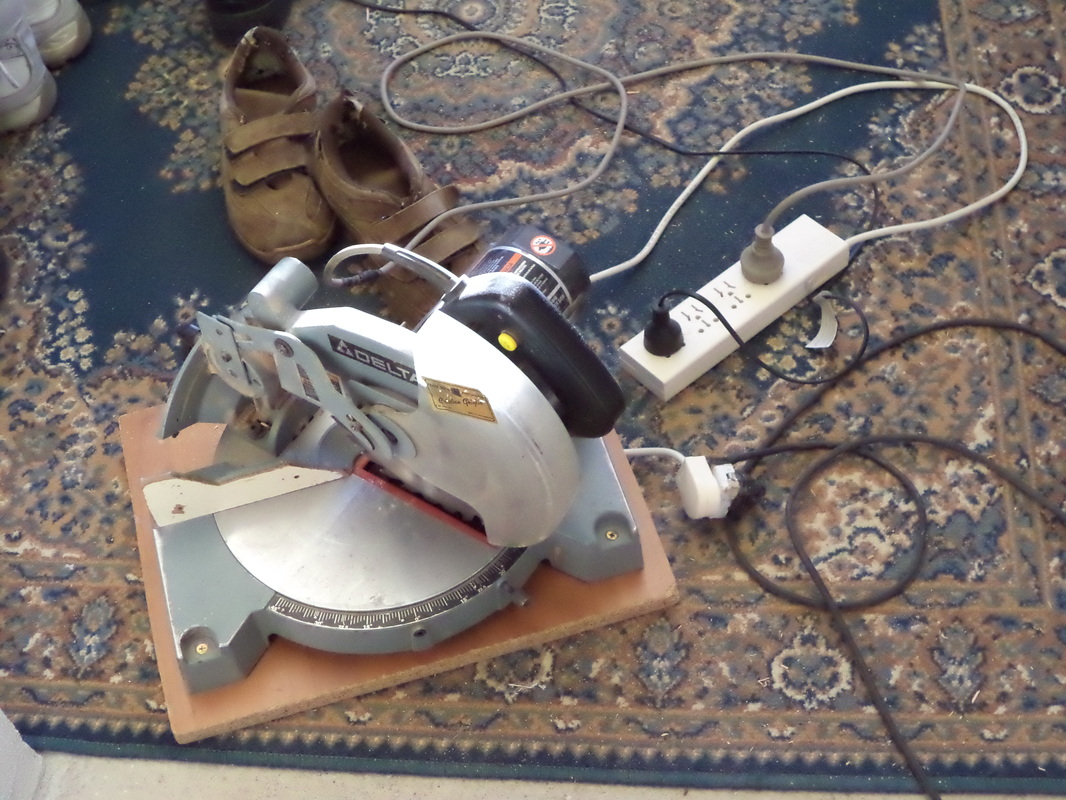
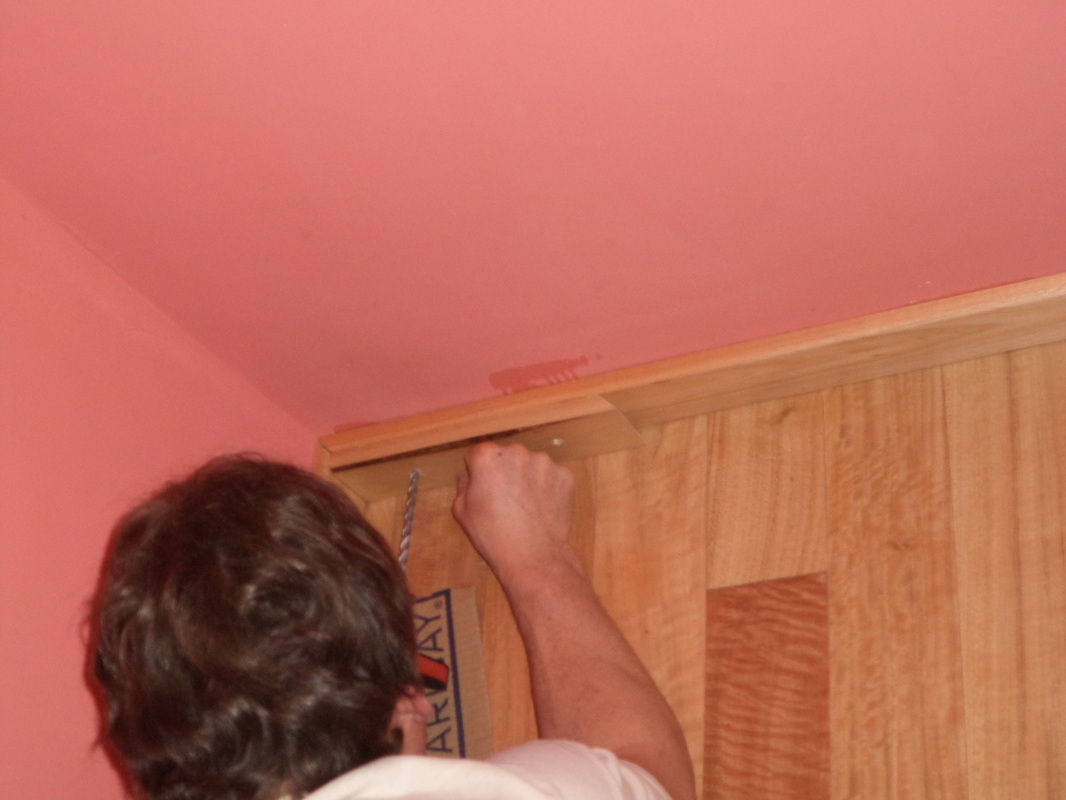
El próximo paso fue cortar cada pedazo a la medida de la pared. Es un poco complicado cuando los cortes hay que hacerlos afuera y entrar a cada rato a chequar que las medidas estén bien (para lo cual la puerta queda abierta para agilizar el tema) y les recuerdo que estamos en invierno…Por suerte, Tom tuvo la delicadeza de hacer la mayor parte de este procedimiento un día en que yo me quedé trabajando hasta tarde en la oficina…
The next step was to cut the baseboards. The task was sort of complicated as it required measuring the wall, going outside and making 45 degrees cuts, coming back inside and checking the final position of each piece. All this while having the door open to make it quicker. Side note: it’s winter here! Lucky me, Tom had the delicacy to make most of the work while I was working late in the office…
Honestamente, no sé por qué se realiza así, pero hay que cortar primero todos los pedazos y presentarlos en su lugar, y recién después se empieza a fijarlos a la pared.
Normalmente se utilizan 2 formas de fijación para que no queden evidencias:
1-se utiliza pegamento
2-se utilizan clavos de acero
Nosotros, no usamos ninguna de las dos: el pegamento podría no ser muy prolijo y podría darnos dificultades si alguna vez decidiéramos sacar los zócalos; los clavos de acero no eran una opción por la cantidad de revoque que tiene nuestra pared.
Así que nos quedó como opción usar tornillos. Llegado este punto, la verdad, es que no me gustó nada la decisión de Tom, porque inevitablemente, se ven. Pero era la mejor alternativa si consideramos los factores: tiempo-costo-terminación. Por suerte de lejos se ve como un tapón.
Honestly, I don’t know why, but first you have to cut all the pieces in the exact measure and put them in their right position. When you’re done with that, you can fix them to the wall.
There are 2 methods used to fix the baseboards to the wall and not leave evidence:
1-use glue
2-use steel nails
We used neither: the glue could have been a mess and would have been a problem, if it ever occurred to us take the baseboards off the wall; the nails were not even a choice because of the bad plastering we have on the walls.
So, we had no choice but to use bolts? Obviously, I didn’t like the fact that bolts can be seen from the distance, but there was no other option, considering time, price and looks. We are lucky that from the distance they look like caps.
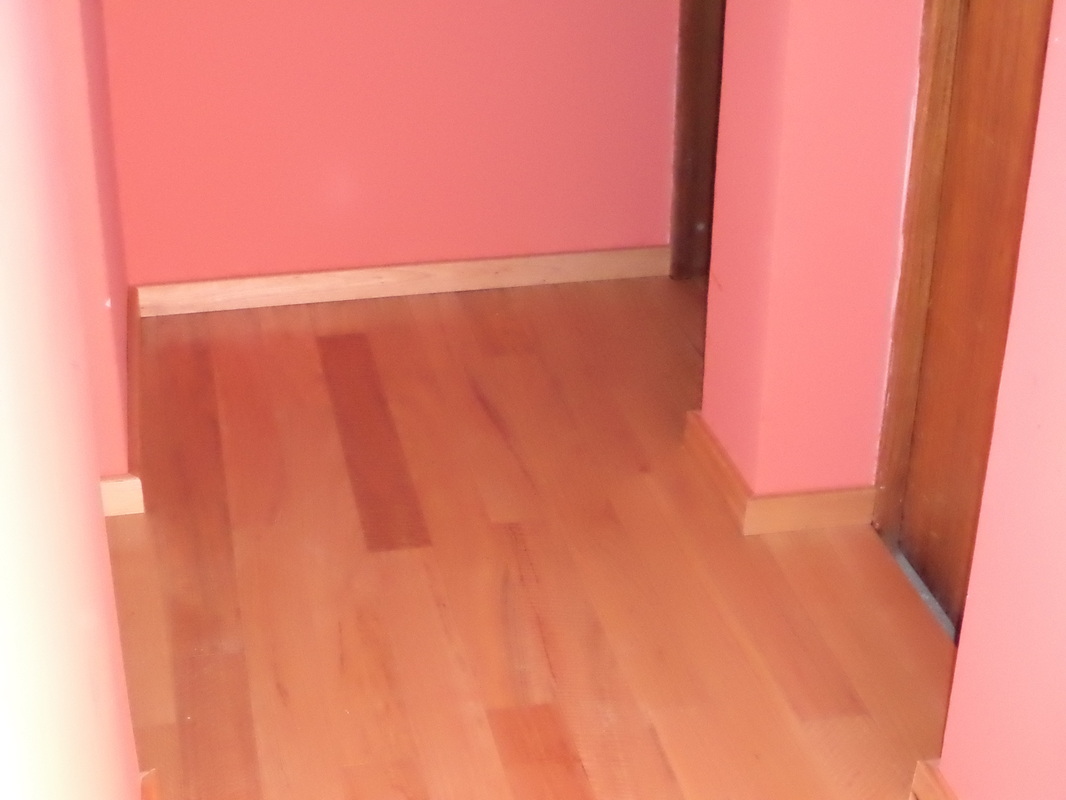
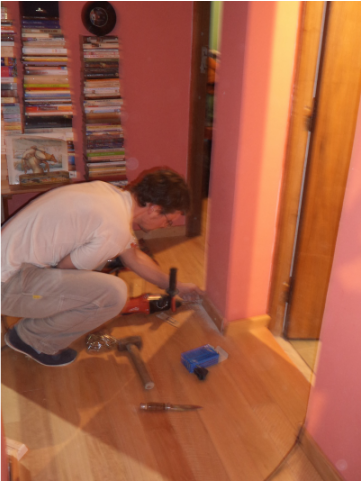
(Perdón por la mala calidad de la foto-Sorry for the crappy photo) Llegado este punto, debo confesar que no todos los zócalos están atornillados, es un trabajo que Tom está haciendo de a poco. Pero si tenemos varios sectores terminados.
I have to confess that not all of the baseboardss are bolted, that’s something Tom is tackling a bit each day. But we do have some spots finished.
| ANTES-BEFORE | DESPUÉS-AFTER | Bussi!
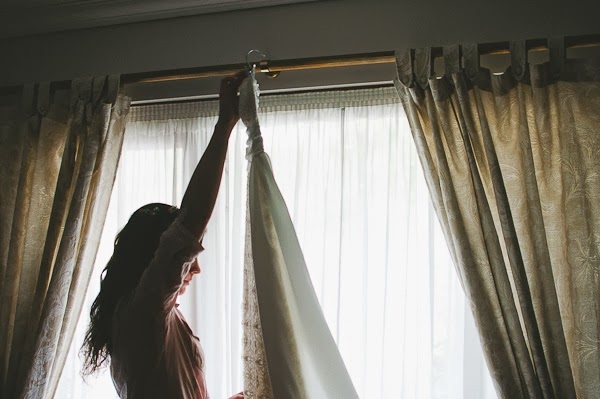
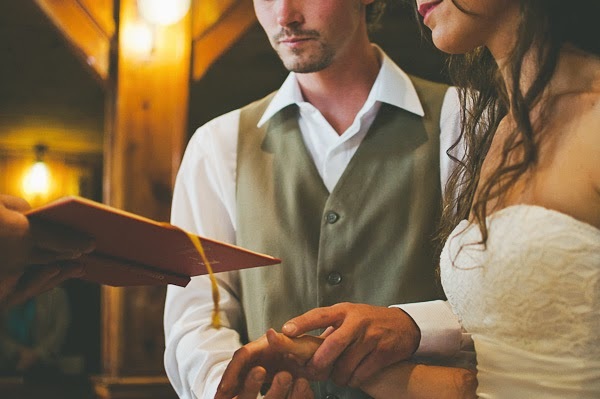
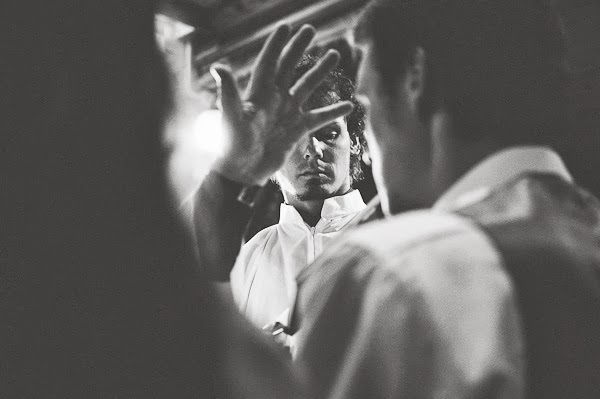
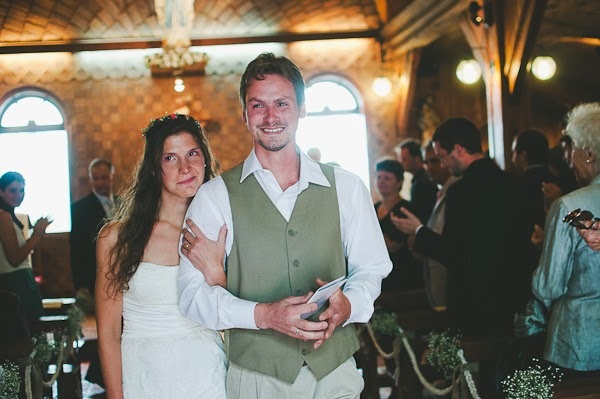
( post original) Nos cuenta Daniela Liska que cuando conoció a Tashi y a Tomi supo que iba a ser una boda muy especial, y no me equivoqué. Ambos son de familia eslovena y tienen un profundo amor hacia su identidad. Se conocieron en el grupo juvenil de la Parroquia, un espacio muy importante para ellos y para su entorno familiar. Tashi yTomi soñaban con poder celebrar su boda de día, al aire libre, se casaron la segunda semana de febrero y a pesar de que todos mantuvieron la esperanza de que el día fuese soleado hasta el último momento, amaneció lluvioso y así permaneció, regalándoles sólo algunos momentos de sol. En palabras de la novia, Tashi: "La elección del fotógrafo fue parte del proceso: mucho tiempo estuvimos mirando ideas de todo, de tipos de vestidos, de ambientaciones, de detalles, de tipos de fotografía...un poco mirando todas esas ideas fuimos sacando aquellas que queríamos hacer y qué "idea rectora" iba a ser la conductora. Elegimos que ese día tenía que ser reflejo de lo que somos nosotros: sencillo, como si fuera un "pic-nic" (queríamos hacerlo al aire libre), relajado, casero... De ahí se desprendió la elección de materiales: arpillera, puntillas, estampados tipo picnic (banderines), pizarrones, el pasto...lo otro importante es que pudieran ser cosas que pudiéramos hacer nosotros mismos, eso nos llevó a conocernos en otros aspectos, en trabajar juntos, pasar el tiempo juntos, etc. La elección del fotógrafo fue la búsqueda de lo auténtico, sencillo y real. (frente a lo programado o preparado que suele ser). Hoy cuando miramos las fotos es recordar cada cosa que pasó...y tal cual fue! esas fotos evocan emociones... son una expresión artística.... eso es lo que uno aspira querer realizar algo que despierte una determinada emoción o sentimiento....)" Si llegaron hasta acá abajo es que tuvieron ganas de ver todas las fotos :)
(igual puse menos de las que había!!)
Está de más decir lo emocionados que estamos de que nuestra querida fotógrafa Daniela haya pensado que nuestro casamiento era lo suficientemente "especial" como para salir en un blog internacional! Gracias!!
If you got down here you probably had fun watchong all the photos :)
It is beyond words how thrilled we are that our amazing photographer Daniela thought our wedding was "especial" enough to be featured in an international blog! Thanks!!
(there are more photos on the blog page!!)
Bussi!
Si, como escuchaste, todos tenemos una oportunidad. Y eso es todo, no hay más aclaraciones. De eso se trata: de ver todas las cosas que puede englobar una frase como esa. Y de hecho, puede cambiar, hoy puede tener un significado, mañana otro. Para mi, hoy, lunes después de un fin de semana de pura lluvia y gris, es el descubrir que las personas somos capaces de crear nuestra pasión. Yes, just as you heard it, we all have a chance. And that’s about it, no more clarifying. That is the idea of it: to feel the enormous amount of things that can fall under a phrase like that. And in fact, today it can have one meaning and tomorrow another one. For me , today Monday after a rainy weekend, it is discovering that people can actually build their passion. Me vienen a la mente las clases de inglés a las que asistía cuando era chica y teníamos que escribir ensayos sobre la eterna discusión, bien al estilo de la cinta de Möbius, de “Nature vs Nurture”. Es imposible que un tópico así fuera o uno o lo otro. Del mismo modo, creo que me encuentro ante una situación similar: ser apasionado por algo o cultivar una pasión. Se ha dicho mucho por ahí que la pasión es algo que uno siente dentro y, evidentemente, debe venir con el paquete de genes que nos regalan nuestros padres. Pero hoy leí un artículo ( http://www.theminimalists.com/cal/) que le pone todo el énfasis a la construcción y cultivo de una pasión. Es decir que hay que alimentar a la bestia. I remember the English classes I used to take when I was a child, when I was asked to write essays about the endless, Möbius-strip-like topic of “ Nature vs. Nurture”. It is impossible that such a topic could be one thing or the other. I feel the same way right now: be passionate abour something or cultivate passion. It has been said a lot around that passion is something that belongs to the gene package our parents give us at birth. I read an article today ( http://www.theminimalists.com/cal/) that gives power to the statement that passion has to be built and cultivated. The beast has to be fed, it seems. Esto es música para mis oídos: no todo está perdido! Yo solía pensar (en realidad un poco se me escapa todavía) que si a uno no le quema adentro algo, es que no es lo suficientemente apasionado de fábrica y eso no es modificable…Pero NO.
This is music for my ears: not everything is lost! I used to think (and I must confess that some of these thoughts still come to my mind) that if something is not burning inside, then the person was not “fabricated” passionate enough and that cannot be modified…but NO.
Con lo cual, esto desprendió una catarata de ideas, planes, proyectos…todo eso está ahora en una cacerola fermentando…quién sabe a qué llegaremos!
This discovery made a bursting of all kind of ideas, plans, projects…all these are now in a giant pot being cooked…who knows where this road will lead us!
Otro capítulo: planes & trabajos en proceso
Parece que estoy en silencio y en pausa, pero no es así. Podríamos ponerlo como un tiempo de trabajo de hormiga y sumarle una gran carga de un defecto (o virtud…o simplemente característica) personal: empiezo muchas cosas al mismo tiempo. Y en eso estoy, con muchos proyectos empezados y con ninguno terminado, por el momento…aquí una listita y un anticipo:
1-Cortinas para el dormitorio principal
2-Cómoda para el dormitorio principal (Les debo una foto de este)
3-Cabezal de cama matrimonial
4-Cuadros varios
Another chapter: plans & work in process
I have been quiet for a while and it seems as I had been asleep, but it’s not like that at all. We could picture it as a ant-working-time and add up a personal sort-of-fault (or it could also be a virtue…or just a thing of mine) which is: starting a number of projects at the same time. Which means it takes longer to finish them. So, for the time being I only have a list of things I’ve been laying my hands on lately and some teaser photos:
1-Master bedroom curtains
2-Master bedroom dresser (I owe you a picture of that one)
3-Master bed headboard
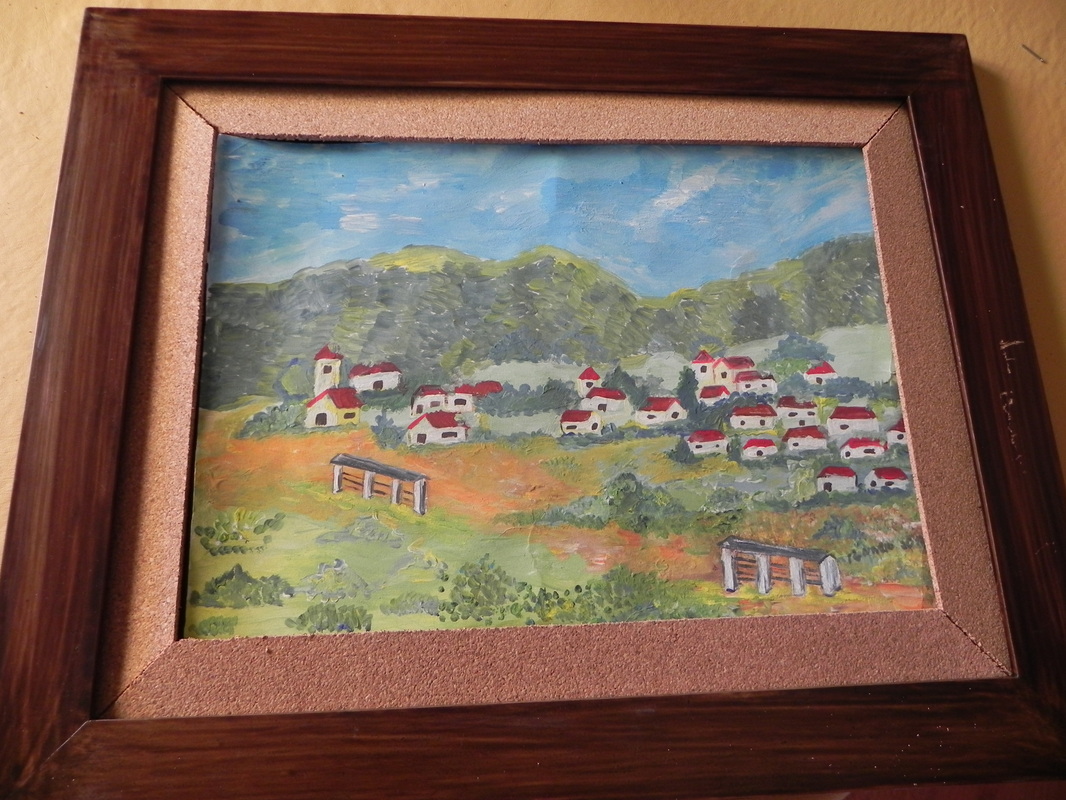
4-Frames & art
| Cortinas en producción-Curtains in production
| Cabezal de cama-Headboard
| ARTE-ART | Cuadro pintado por mi abuelo-Painting by grandpa
| Perfil del amor de mi vida-siluette of the love of my life
| Hay mucho, mucho para contar…y renovadas ganas…y una noticia: La vida NO ha matado al sueño. (si, ya se, este fin de semana vi la película Los Miserables…No pude dejar de sentir un pequeño bajón por las historias de los personajes…por eso mi nuevo lema).
I have lots of things to share…and I’m renovated with exitement…and here’s some news: Life has NOT killed the dream (I know…I saw Les Miserables this weekend…I could help to feel a bit down with those sotries…hence my new motto).
Bussi!
Detesto admitirlo, pero no puedo vivir sin orden....por más que incursione en el mundo del arte y lo “no estructurado”, mi yo ingenieril me supera y TIENE que haber orden. De algún tipo, cualquier orden, pero orden al fin.
I hate to admit this, but I can´t live without order...it doesn't mean anything to put some art and no-structure in my life, my inner engineer it's stronger and there HAS to be some order. Of some sort, any type of order.
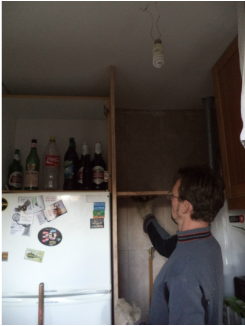
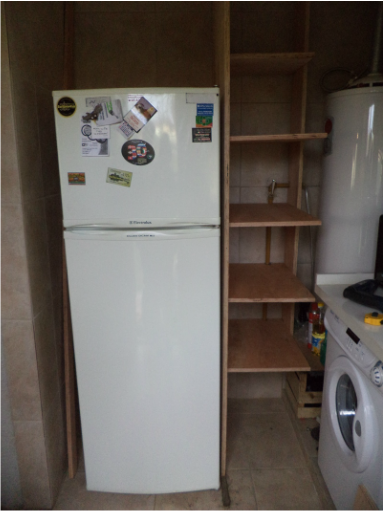
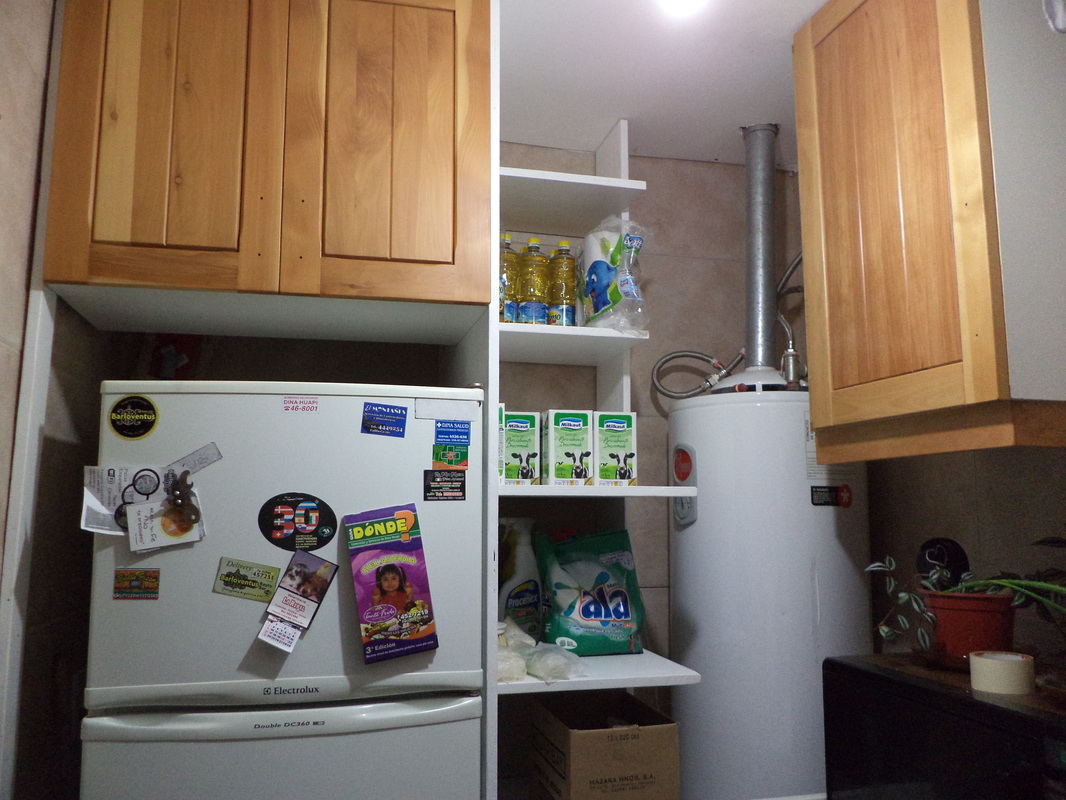
¿A qué viene esto? Hace tiempo que venimos charlando con Tom de hacer algún tipo de estantería integrada para ganar espacio en el lavadero. Decidimos armar un conjunto integrado que contuviera la heladera, una alacena con doble puerta (similar a una de una sola puerta que ya tenemos en el lavadero) y en un lateral una estantería vertical.
Movimos un poco las cosas de lugar (pusimos el microondas que estaba sobre la heladera a la mesada del lavadero).
Where am I going with this? We've ben talking about this for a long time with Tom: building some shelving and built in the laundry room to gain more space. We wanted to incoroprate the fridge into this whole thing. Add cabinets (we do have a similar one already) and vertical shelves.
We moved the things a little bit: we placed the microvawe on top of the Corian counter.
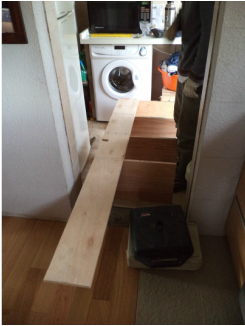
Toda esta operación nos llevo unos cuantos días repartidos principalmente en fines de semana.
Pero vamos paso a paso:
Primero dibujamos todas nuestras ideas y divagamos en el mismo lavadero moviendo cosas y viendo qué quedaba mejor dónde.
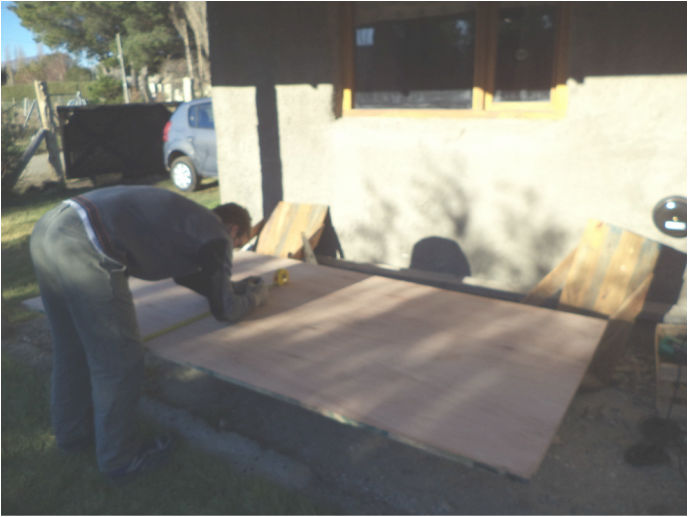
Después de decidirnos por una disposición fuimos a comprar una placa de fenólico y cortamos los pedazos según las medidas.
This whole operation took us a few days but all of them were part of weekends.
But lets go step by step:
First, we draw our ideas and we spent some time moving things in the laundry room to see what suited us best and where should every thing be placed.
After that we decided to go with one disposition, we bought one plate of plywood and we cut it into the pieces we needed.
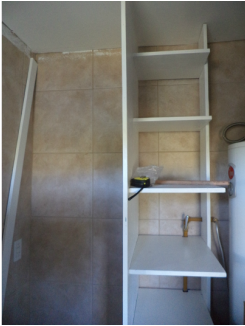
Fuimos armando la estantería, que era la parte más crítica mientras cortábamos.
(Nota: nuestra hermosa casita tiene un pequeño defecto: muchas de las paredes están fuera de escuadra, lo que hace sumamente importante montar los elementos que van empotrados y hacer cada pedazo a medida, antes de darle el look final).
We started to build the shelves, before painting the plywood, just to see if our idea was going to work.
(Side note: our house has a little problem: many of the walls are not well leveled, which makes it crucial in some cases to build the whole thing first to see if any dimensions have to be modified. Every piece has to be cut to fit its final position.)
Desarmamos todo y devolvimos todo lo que habíamos movido a su lugar.
Ahora quedaba la gran tarea de lijar todas las placas y pintarlas (le di 3 manos de pintura blanca látex satinada). Debo decir que la calidad del fenólico que compramos daba mucho que desear y si hubiéramos elegido alguna otra placa que asegurara una superficie más lisa quizás hubiera quedado más “perfecto”, pero el costo juega un importante papel. Decidimos que la perfección en el lavadero no era lo más importante, asi que nos decidimos por la placa más barata. De todas maneras la terminación después de pintarla fue muy buena!
We dismanteled the shelving and put everything back to its original place.
The next step was to sand all the boaards and paint them (I put 3 coats of white paint) I have to say that I am not happy with the quality of the plywood and if we would've bought another type of wooden board with a more even surface, we could've had a more “perfect” look, but cost plays a mayor role in these decisions. We decided that “perfect” was not necessary in the laundry room, so we went ahead with plywood. In the end, we were very happy with the result after painting the boards.
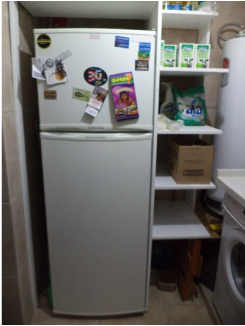
El último paso fue volver a mover todos los muebles y trastos y armar todo el conjunto.
The last step was to move all the furniture and things we had stored and build it. Estamos super contentos con el producto final, estamos totalmente felices de poder sacar las mil y una cosas que teníamos apiladas o en caja, pero de todas maneras este proyecto sigue en proceso.
We are amazed with the final product and we are happy to be able to have place to store everything we had piled in that room. Anyway, we still have a lot of work in there.
| ANTES / BEFORE | DESPUÉS / AFTER
| Pasos a seguir:
-Elegir alguna tela (gama de los turquesas?) y hacer una cortina para tapar debajo de la mesada
-Posiblemente hacer un estante debajo de la mesada
-Determinar qué hacer en el hueco que quedó entre la heladera y la alacena. Opciones: tapa de madera (blanca o de algún color), cortina, estantes arriba y abajo.....sugerencias?
-Poner también una cortina para tapar el escobero (entre heladera y pared)? Alguna otra opción?
-Moldura/tira de madera en el techo: ojo con la apertura de la puerta de la alacena.
-Luz
To-do list:
-Choose a nice fabric (maybe some type of turquoise?) and sew curtains below the counter.
-Possibly build a shelf below the counter.
-Think possible solutions for the space between the fridge and the cabinet. Options: wood board (white or some other color), curtain, shelves...other suggestions?
-Add curtain to hide the brooms and similar between the fridge and the wall. Any other idea for this place?
-Moulding on the roof limit: we have to be careful to be able to open the the cabinet door.
-Lighting
Bussi!
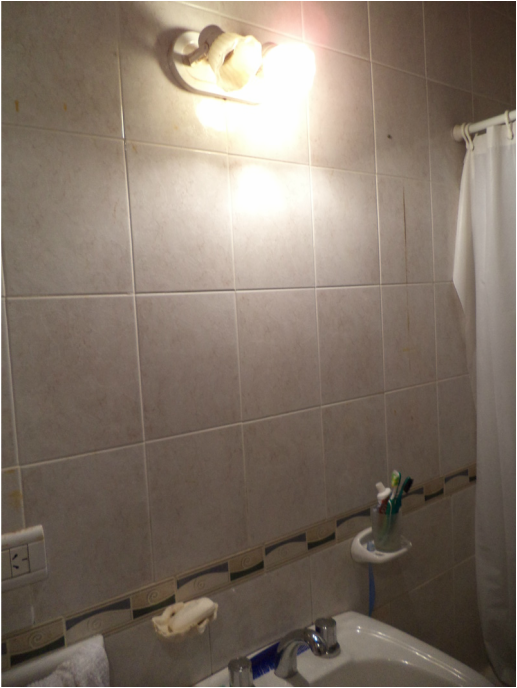
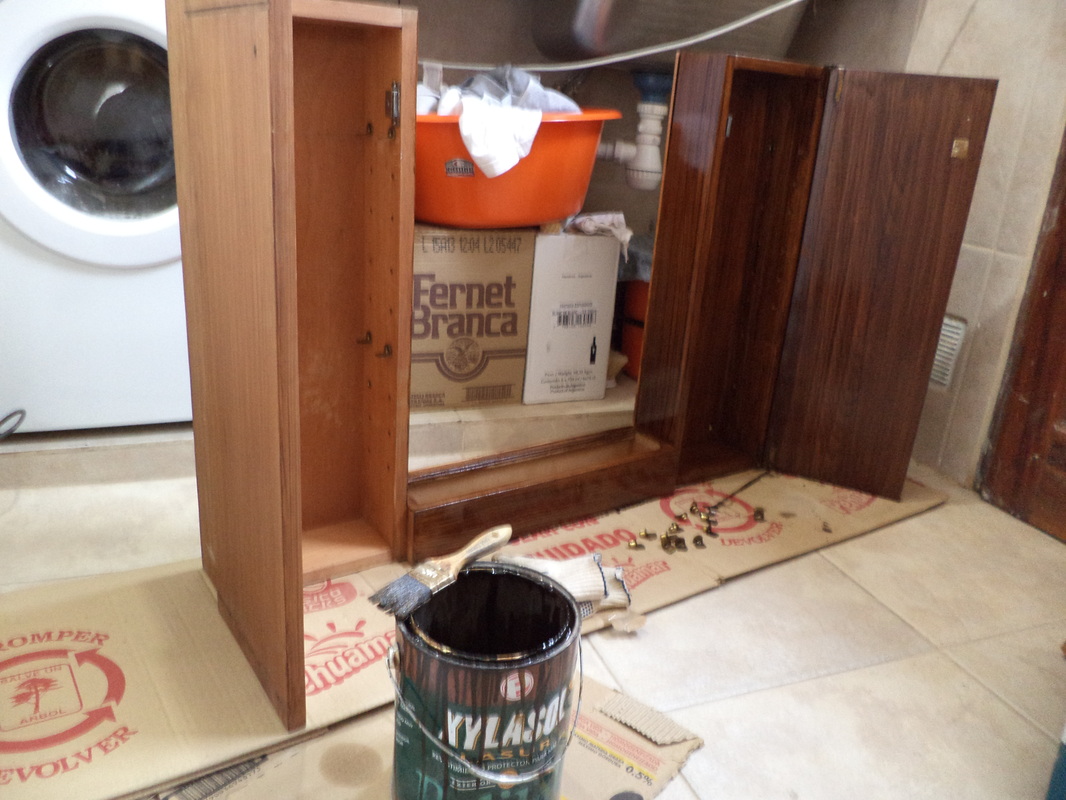
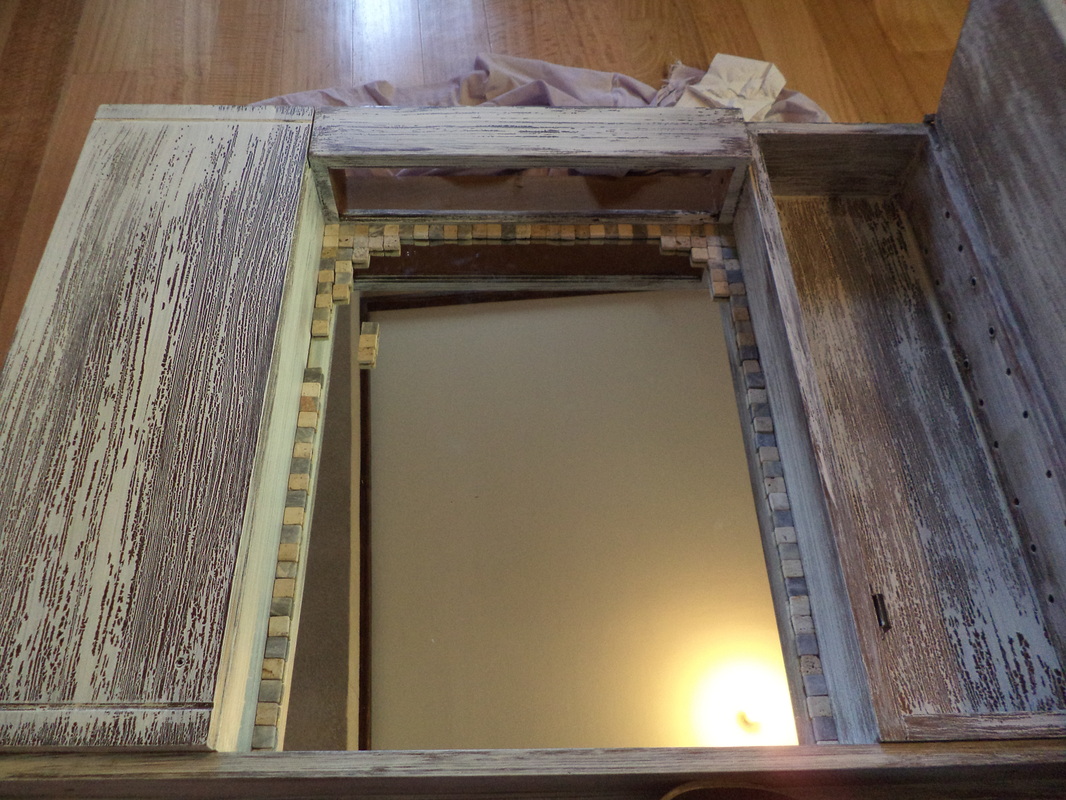
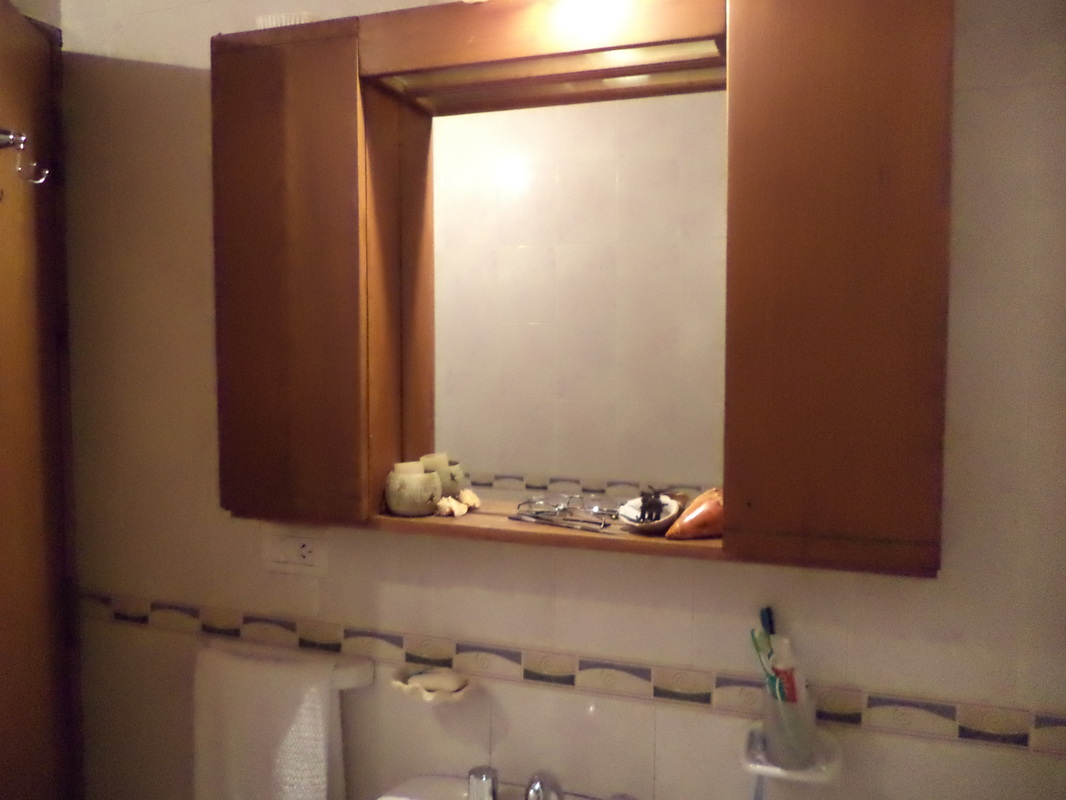
¿Recuerdan la estantería que armamos en el baño? Bueno, no podíamos dejar que desentonara con el resto de las cosas, ¿no? Así que agarramos el mueble del espejo y le pintamos la cara… Remember the shelves we built for the bathroom? Well, we couldn’t leave them standing alone by themselves, could we? So we gave the mirror cabinet another face… Les cuento que bastante tétrico quedó la pared sin nada….como si de repente uno se sintiera encerrado… When we took off the mirror cabinet from the wall, I got to tell you, the look of the wall was terrifying…you could just feel some kind of trapped in there… A pesar de que es mínimo el lavadero, decidí pintarlo ahí, así no tenía que movilizarme tanto. El mueble está en buen estado, así que decidí no lijarlo y darle las mismas capas que a la estantería: I chose to pain the cabinet in the laundry room, although the space in there is very small, but in that way I could freely move around the house and the paint job was actually more comfortable. The cabinet was in good shape so it didn’t need any other thing but the coats of paint, and I used the same process than with the shelves: - Una capa de tintura. One coat of Brown stain.
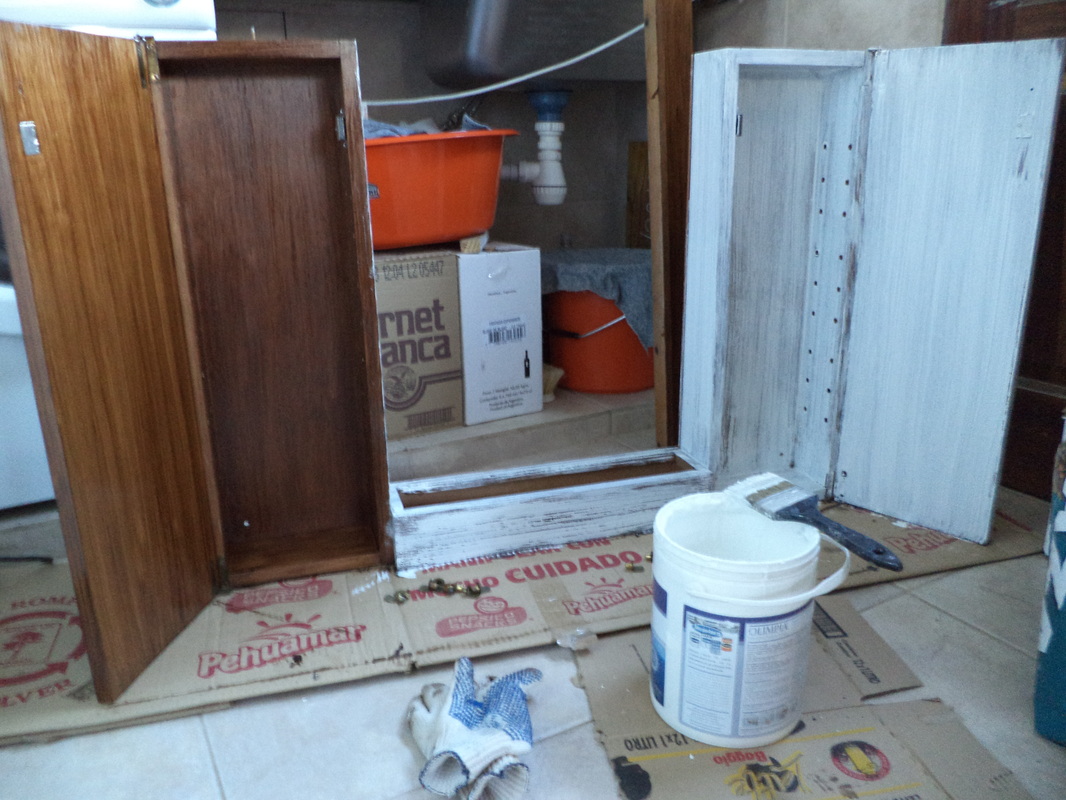
2. Una capa de pintura blanca al agua. One coat of white water-based paint.
3. Una capa de barniz. One coat of water-proof coating.
Todo eso fue en un día: la primer capa a la mañana, la segunda a la tarde y la tercera a la noche. Al día siguiente queríamos armarlo y ya ponerlo, porque recibíamos visitas, pero no llegamos…
Armamos el armario (hubo que desarmarlo para pintarlo), le pusimos el vidrio y le agregamos el detalle de las venecitas. Estas venecitas las había guardado de unos cuadros que mi mamá encontró en la calle. Los cuadros eran truchísimos, pero ternían estas venecitas que despegué y guardé esperando un hogar para ellas. Los colores eran perfectos para nuestro “baño en el mar” asi que decidí hacerle una guarda:
All of that was done in one day: I painted the first coat of stain in the morning, the s econd coat of White paint after lunch and the last one at night. We wanted to hang it in the bathroom the very next day (we were expecting visits), but we didn’t make it…
So, we put the pieces of the cabinet together and added the mirror we had removed before painting. Then we did a detail using mosaic tiles. I had been saving these small tiles for a while now: my mom had found some (horrible) frames on the street, but they had the tiles glued on them. I decided to keep them for some future project, so here you are…they found a home!
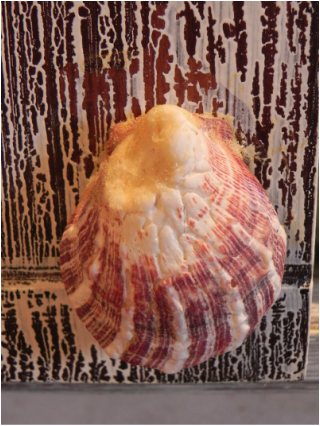
Mientras yo hacía eso, Tom se encargaba de inventar los tiradores con caracoles, lo cual terminó siendo todo un desafío porque eran difíciles de pegar en una forma en que sirvieran como tirador…Este pegamento fue el que no dejó que termináramos el mueble a tiempo para las visitas…Es bastante feo a la vista como queda, pero tendremos que hacer un trabajito de limpieza después.
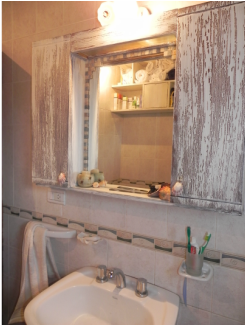
De todas maneras estamos muy contentos con el resultado: tenemos suficiente espacio de guardado, el color hace que se vea más luminoso el lugar, nos recuerda al mar…
While I was doing that, Tom was in charge of the cabinet shell-knobs, which ended up being quite a challenge, because they were so difficult to glue in the position we wanted…That glue he used was the one that prevented us from putting the mirror cabinet in its place before the visits came…for now the glue is one of the many things we have yet to clean, as it doesn’t look too gorgeous right now…
Apart from these details we’d like to tackle in the future, we are very happy with the result of what we did in the bathroom: we have enough storage space now, the light color makes it look ton better, it takes us back to the sea…
Cosas que nos quedan por hacer:
-Detalles de terminación del mueble: pintar bordes, sacar pegamento de los tiradores, etc.
-Cambiar la iluminación en general.
-Conseguir algunos canastos, cajas para los elemento de la estantería.
-Sacar los artefactos simil-metálicos que todavía quedan.
-Hacer alguna repisa en la zona de la ducha.
-Hacer o conseguir una cortina de baño.
-Reemplazar las toallas para pies.
-Colgar arte.
Tenemos bastante para entretenernos todavía….
Things we have on our to-do list:
-Details of the cabinet: paint missing spots; clean the shell-knobs, etc.
-Change/add lighting fixtures.
-Find some kind of box, basket for the items of the shelves.
-Remove all the old sort-of-metallic accessories that are still there.
-Build some shelving in the bath area.
-Find/do a proper bath curtain.
-Replace the feet towels.
-Hang some art.
As you see, there’s much to be done…
| ANTES / BEFORE | DESPUÉS / AFTER | Bussi!
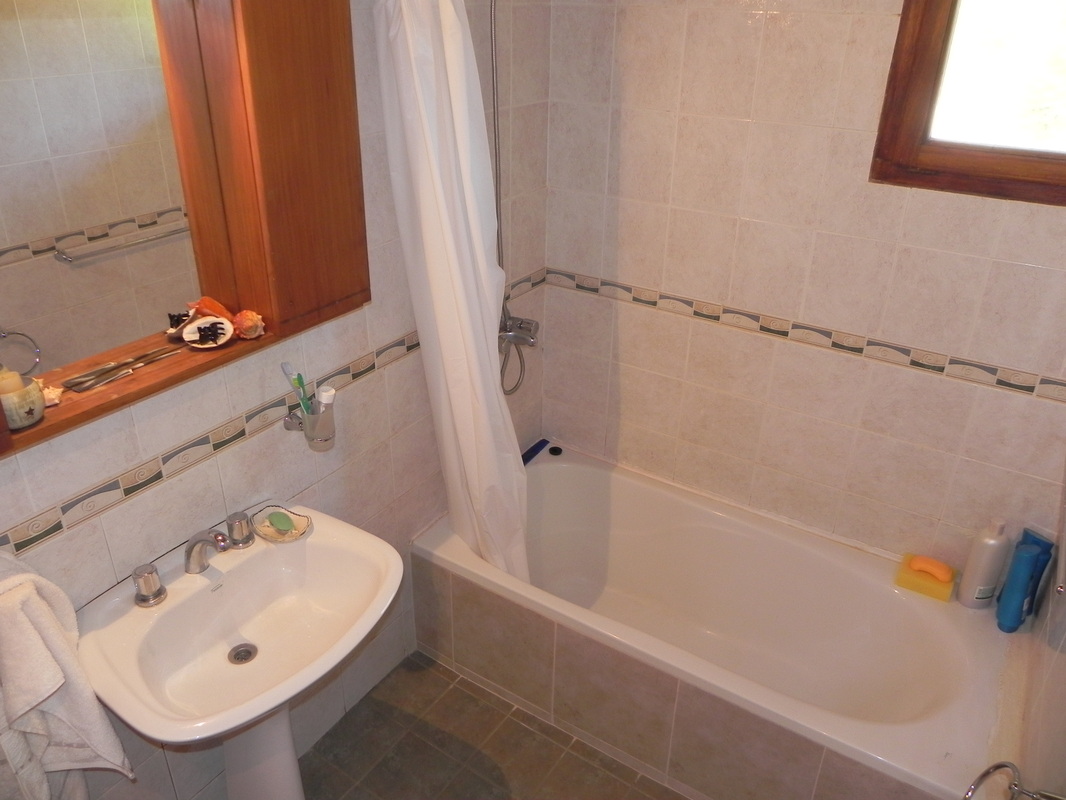
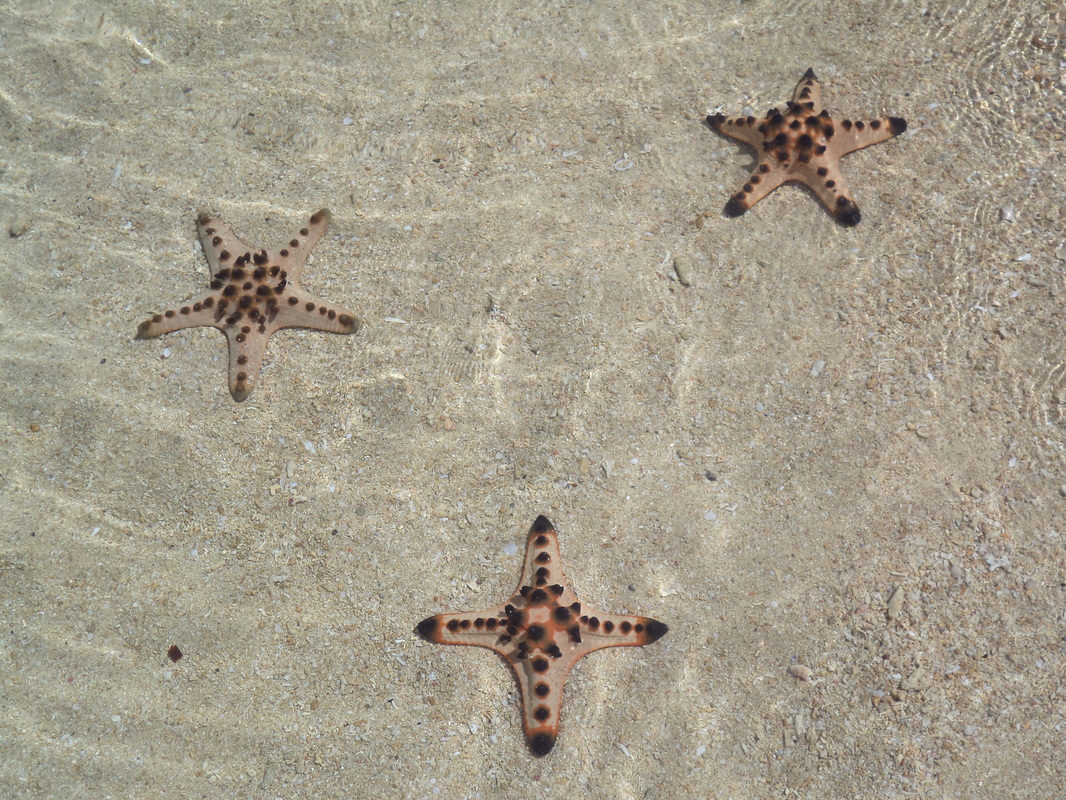
Como les chusmeé la vez anterior, el mar se vino a nuestra casa, más específicamente a nuestro baño. Parece que quedamos absolutamente fascinados con las vivencias de nuestro viaje, que tenía que quedar reflejado en algún lado (o quien dice, en varios).
Volvamos a la foto inspiración:
As I mentioned before, the sea came to our house, specifically into the bathrooom. It seems we were left speechless and totally fasinated with the scenary and everything we lived in our trip that it had to be reflected somewhere in the house (or, who says, in many places in the house).
Lets get back to the inspiring photo:
AHHH (suspiro) (sigh)
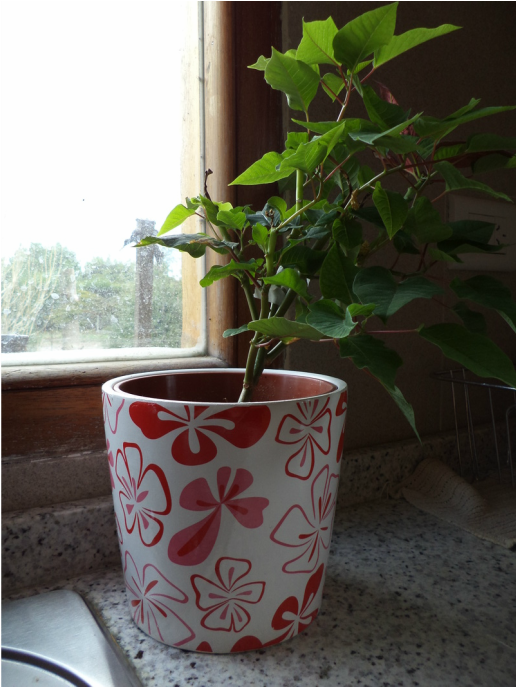
Rebobinemos. Todo empezó cuando fuimos un sábado a la tarde al Hipertehuelche (estaré haciéndole justicia al lugar si digo que es como un Easy pero dejando mucho que desear?) a ver si encontrábamos algo interesante para comprar. Fue bastante decepcionante lo que vimos, pero no nos fuimos con las manos vacías! Creo que el área de jardinería salió ganadora, ya que nos llevamos una planta nueva y una hermosa maceta cerámica en tonos de blanco y rojo que fue a vivir a la cocina con la planta de Pascua (si mal no recuerdo su nombre).
Lets rewind. Everything started when we decided to go to the Hipertehueche (will I be making the place justice if I say that is something like Easy, but not quite?) to see if we found something interesting to buy. The whole thing turned out to be rather dissapointing, but we didn`t leave the place empty-handed! I think that the gardening area won as the best one, we left with a plant and a red-and-white plant pot that went to live to the kitchen with our Easter plant (if I remember well the name).
Además compramos artefactos cerámicos blancos para el baño, así cambiamos esos simil-metálicos que perecen de plástico. Yo pensaba que ese tipo de productos solo era para empotrar, pero resulta que se pegan: vienen con una cinta tipo bifaz y además uno debería agregar algún tipo de pegamento, o eso hicimos nosotros por lo menos.
Besides the gardening things we bought white apliances for the bathroom so we could change those sort-of-metallic ones we had, that actually seem made out of plastic. I thought that kind of products (the ceramic ones) had to be placed when building, but we found ones that can be glued: they come with some sort of tape and we adden extra glue.
| ANTES/BEFORE
| DESPUÉS/AFTER | Notar el apoya cepillo de dientes, jabonera y toallero.
Note the toothbrush holder, the soap holder and the towel holder.
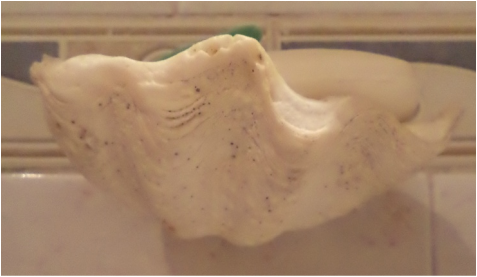
Detalle de la jabonera.
Detail of the soap holder.
Pueden ver que la diferencia es abismal, realmente suma puntos el deshacerse de los metálicos...
You can see the huge difference there is between the old sort-of-metallic ones and the new white ceramic ones...we had to get rid of the first ones...
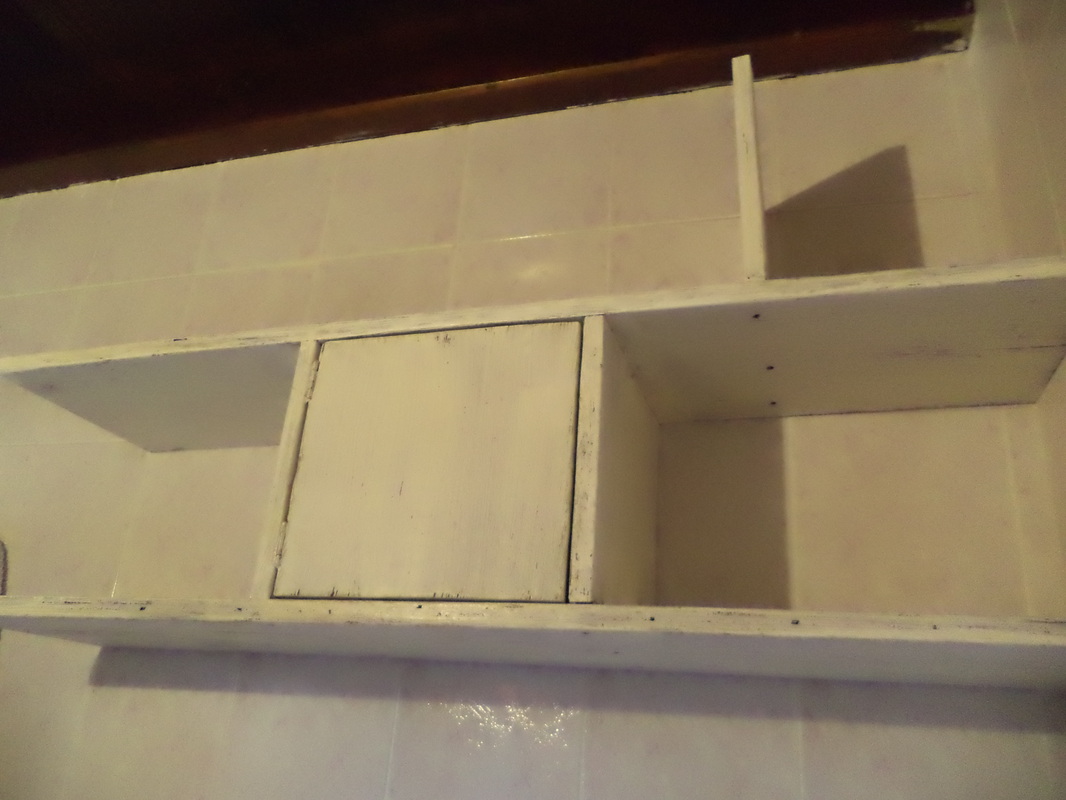
Y ya que habíamos empezado a hacerle algunos cambios al baño, nos pareció que hacer unos simples estantes podía ser una buena forma de empezar a conseguir más lugar de guardado, cosa que tanta falta nos hace...Digamos que hace unos 4 meses que vivimos en esa casa y todavía tenemos cajas dando vueltas por ahi...
As we had already started to make changes in the bathroom we thougt it would be a good idea to build some shelves to gain more storage place, something we lack a lot these days...Lets say we've been living something like 4 months in the house and we still have boxes laying around...
Mi querido Tom hizo el diseño: hizo coincidir las tablas con las líneas de los cerámicos, incluyó un espacio cerrado con puertita para que tengamos un botiquín y agregó una división vertical más.
Se los presento:
My darling Tom did the design of the shelving: he aligned the shelves with the tiles of the wall, included a small box with a door to be used as a first aid kit and he added another vertical divison.
This is it:
Y así estaba el lugar cuando no había nada:
And this is how the place looked when there was nothing there:
Sencillamente son placas de fenólico, con una mano de Cetol y luego una mano de pintura blanca al agua. Para proteger un poco la superficie terminé con una mano de barniz incoloro mate.
It was built simply out of plywood, with one hand of Brownish stain, and one coat of white wall paint. We added a coat of protection on top of it all.
Lástima que no tengo ninguna foto del proceso de pintura y solo una de la colocación, que fue todo un desafío, porque la estantería está sobre el inodoro bastante alto (como para no golpearse la cabeza) y no había muchos lugares para apoyarse...
Aquí está una foto durante la colocación:
It's a shame I don´t have any pictures of the painting process and just one of the moment we placed the shelves, which I have to say that quite a challenge as the shelves are high (so as not to bump your head on them while standing) and there were no places to stand on...
Here's the shelving complete while we were placing it:
Quedan algunos detalles que nos gustaría agregar, como por ejemplo algún tipo de canasto o cajita para poner todas las cremas y potes y unificar así un poco los colores; agregarle los tiradores a la puertita del botoquín así como la cruz, aunque no creo que sea roja...
There are some details left we would like to tackle before long, like for example some sort of box to contain all the pots and litlle things that we now have on the shelves, so as to unify the colors and shapes; add some hanle to the first aid box door and a cross, although I think it won´t be red...
De todas maneras los agregados y cambios en el baño recién empiezan, así que verán mas!
By the way, the adding of items in the bathroom only begun, so there will be more to show!
Bussi!
Hace unas semanas ya, volvimos de nuestra aventura del otro lado del mundo...descansamos y renovamos las pilas! De a poco nos vamos organizando, volviendo a la rutina y a las ideas!
We've been back home for some weeks now, after coming back from the other side of the world...we relaxed and charged the batteries! Little by little we start orginizing ourselves, going back to the routine and to the big ideas!
Tenemos entre manos la lavada de cara del baño, pero los voy a dejar un poco más con la intriga y mientras nosotros avanzamos...Sólo les voy dando una idea de nuestra inspiración:
We have the project of making our bathroom look a bit more updated, but I'm leaving you with the intrigue some more time, and in the meantime we'll move on with it...For the time being I'm going to leave an idea of our inspiration:
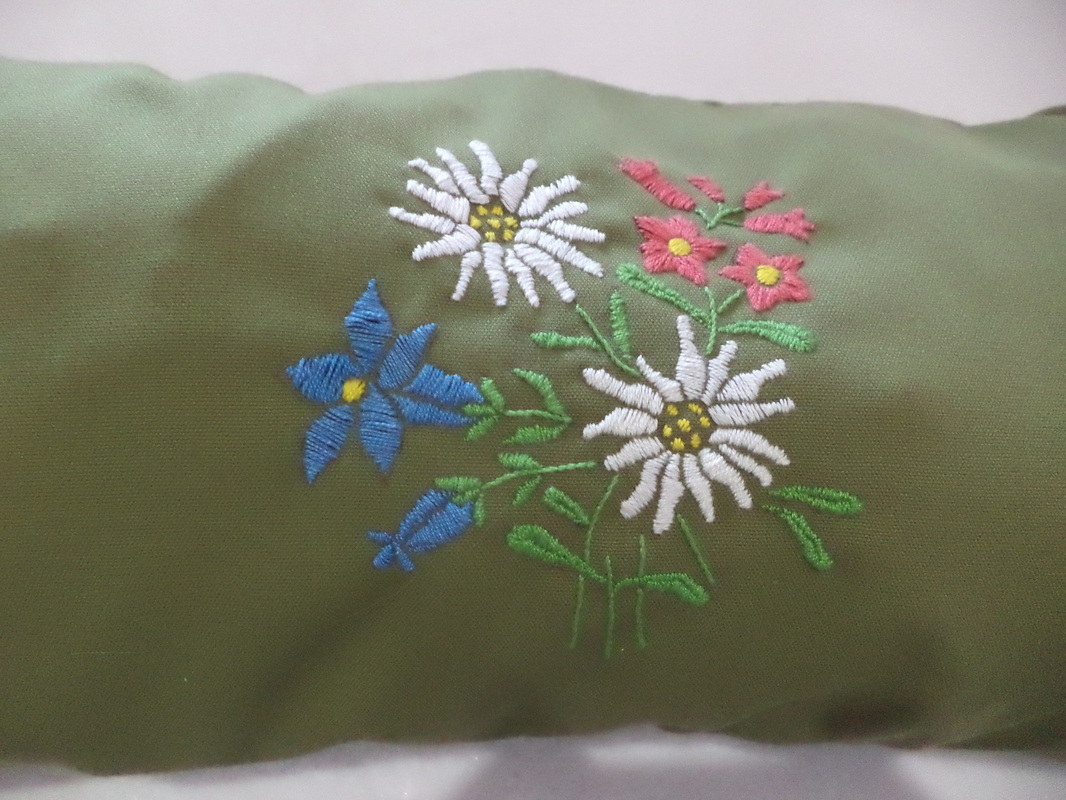
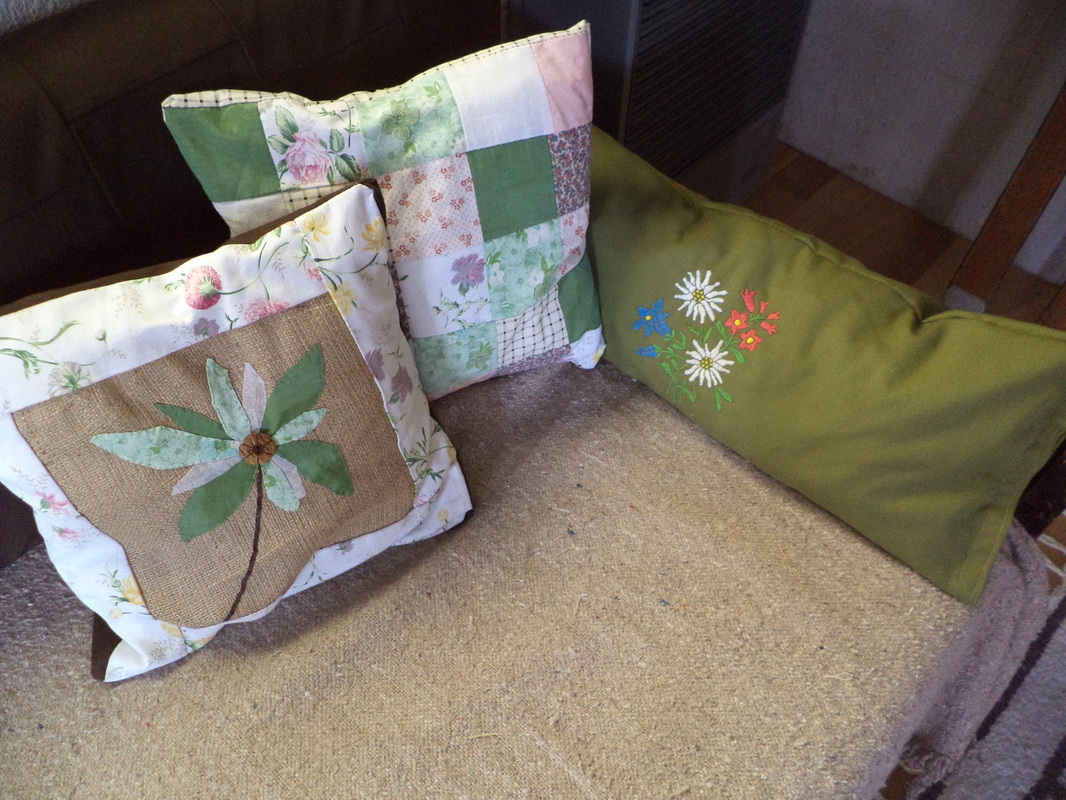
Pero para que no se queden c on las ganas de que les comparta algo, aquí va mi última creación:
But, so as not to leave you without any new sharing, I'll show you my latest creation:
La funda ya la tenía, en realidad era el doble de grande y lo que hice fue dividirla a la mitad. En esta primer mitad el diseño que elegí para bordar son unas flores alpinas, quizás la más conocida es la blanca, el Edelweiss.
La verdad, fue uno de esos proyectos que se van estirando con el tiempo...creo que me habrá llevado como 1 año...fue dejado y retomado muchas veces; fue interrumpido por las actividades (más priritarias) del casamiento y fue lindo haberlo empezado antes de mudarme a esta casa y haberlo terminado aquí.
I already had the pillow cover, in fact it was double its size, the only thing I did was cut it in half. In the first half the design I chose to embroider was a thresom of alpine flowers, maybe the most known of them is the white one, Edelweiss.
The truth is that this one was a project that took a long time...I thing it took me something like a whole year...it was taken in hands and left many times; it was interrupted by (most important) tasks for the wedding and it was nice to have started it before moving into this house and to have finished it here.
¿Alguna vez se pusieron a hacer algún proyecto y tardaron (infinitamente) más de lo que pensaban?
Did you ever started a project that took you (way) longer than you thought?
Bussi!
Ya pasado el GRAN evento, volvemos a temas de la casa....voy a empezar con un estado general, asi sirve para organizar un poco las ideas...
The big day has gone by, so w're back to the house...I'll start telling how's with the house today, so we'll be more organized with the ideas...
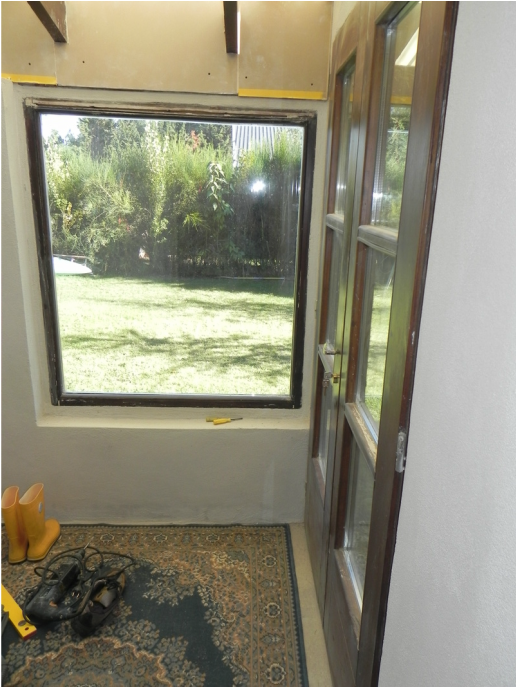
Entrada: este lugar es, en realidad, un agregado que hicimos nosotros. Hicimos construir las
paredes y colocar la puerta y ventana, y este trabajo fue parte de cerrar el living. Por ahora no es
más que un cuadrado cerrado que debería convertirse en el lugar de cambio de calzado, de dejar
los abrigos, etc. Trabajos por hacer:
• Pintar
• Hacer el piso, posiblemente reciclando cerámicos
• Construir un mueble (o varios) para guardar calzados y abrigo
• Incluir un espacio para sentarse
• Colocar luz (cable+artefacto)
• Timbre o campana?
Entry way: this place is actually something we added. We had the walls build, the windows and door put into place, and this work was part of adding walls in the living room area. For the time being is just a 4-wall closed space that should become the place were we leave our coats and shoes. Work to be done:
• Paint
• Do the floor, possibly recycling old tiles
• Build some firnishing to store the coats and shoes
• Include some sitting space
• Put lighting
• Doorbell
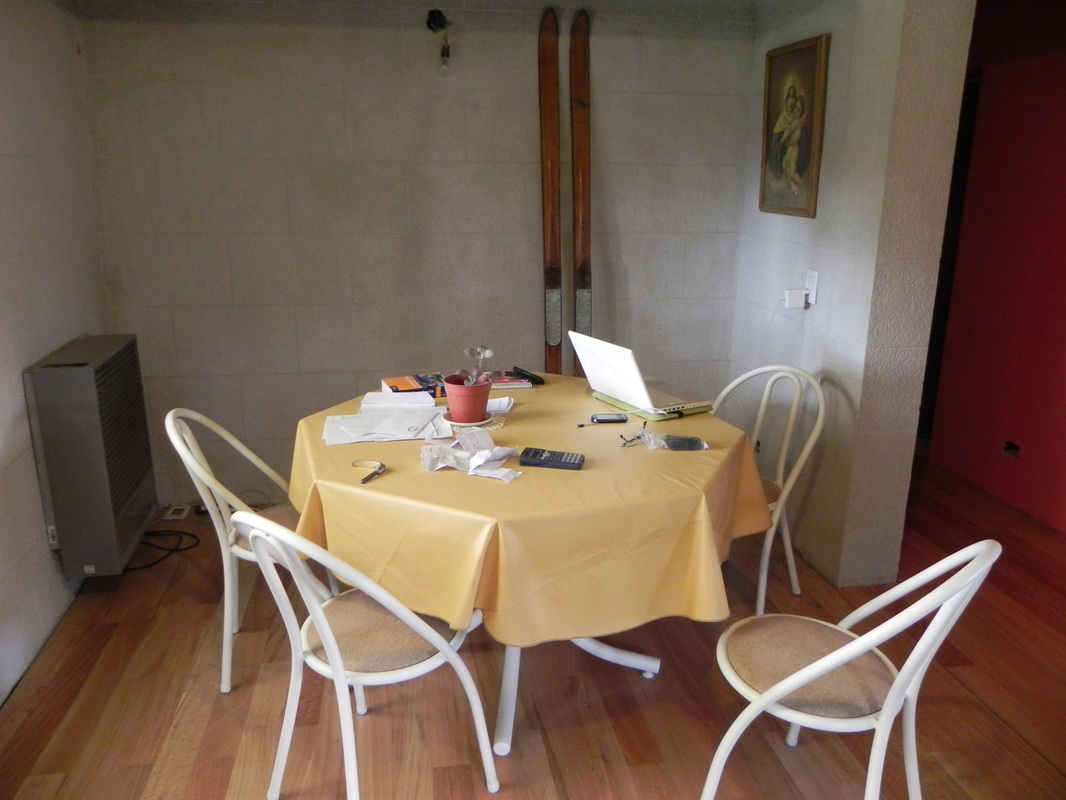
Comedor: este lugar es un lugar algo tramposo, porque es demasiado grande para ser sólo
comedor, es el punto central de la casa y, por lo tanto, conecta el resto de los sectores. Así que,
estrictamente, sólo el sector izquierdo está destinado a las comidas. Tenemos por el momento
sillas y mesa recicladas y algunas cosas sueltas.
• Hacer el entramado del techo (esto no se ve en la foto, es al fondo, atrás de la última viga)
• Arreglar el cablerío del sistema de riego
• Colgar algo en la pared?
• Cortinas: si o no?
• Encontrar algún mueble de apoyo
• Sacar calefactor?
• Cambiar las sillas por banco y buscar una mesa más grande (y cuadrada/rectangular)
Dining room: this is a bit tricky place because it's too big to be only a dinig room. It's the central area of the house and for this fact it connects with the other rooms of the house. So, strictly only the left side is for the eating. For the time being we have some recycled chairs and table and some extra items.
• Do the wood work on the ceiling
• Fix (or do something to hide) all the cables of the watering system
• Hang something on the wall
• Curtains: yes or no?
• Find some supporting firniture
• Take out the heater
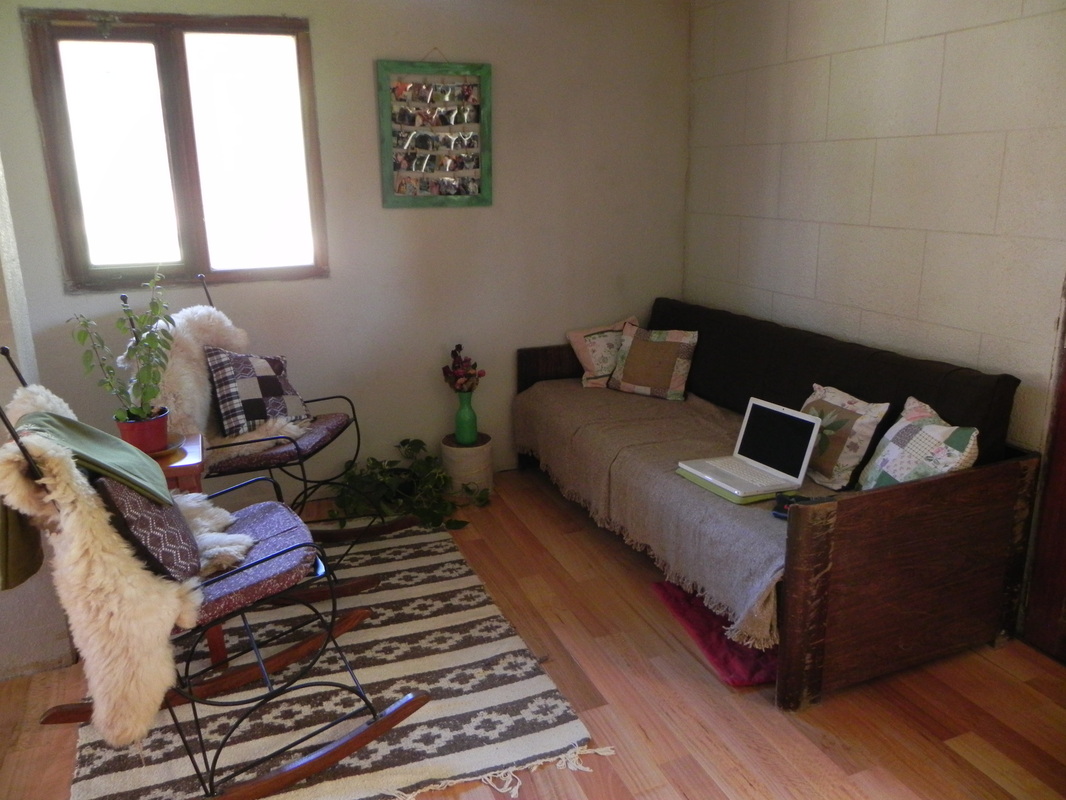
Estar (por el momento): por decreto dividí el comedor en dos, manteniendo el lado izquierdo como tal, y nombrando “estar” el lado derecho. Esta zona será el espacio que dividirá el comedor del living.
• Proyectar futura escalera al 2° piso
Living room (for now): we decided to split the area of the dinnin room in two areas, so what is on the right side od te "real" dining area is a sort-of living room. This area will neighbour with the new living room.
• Design the stairs for the 2° floor
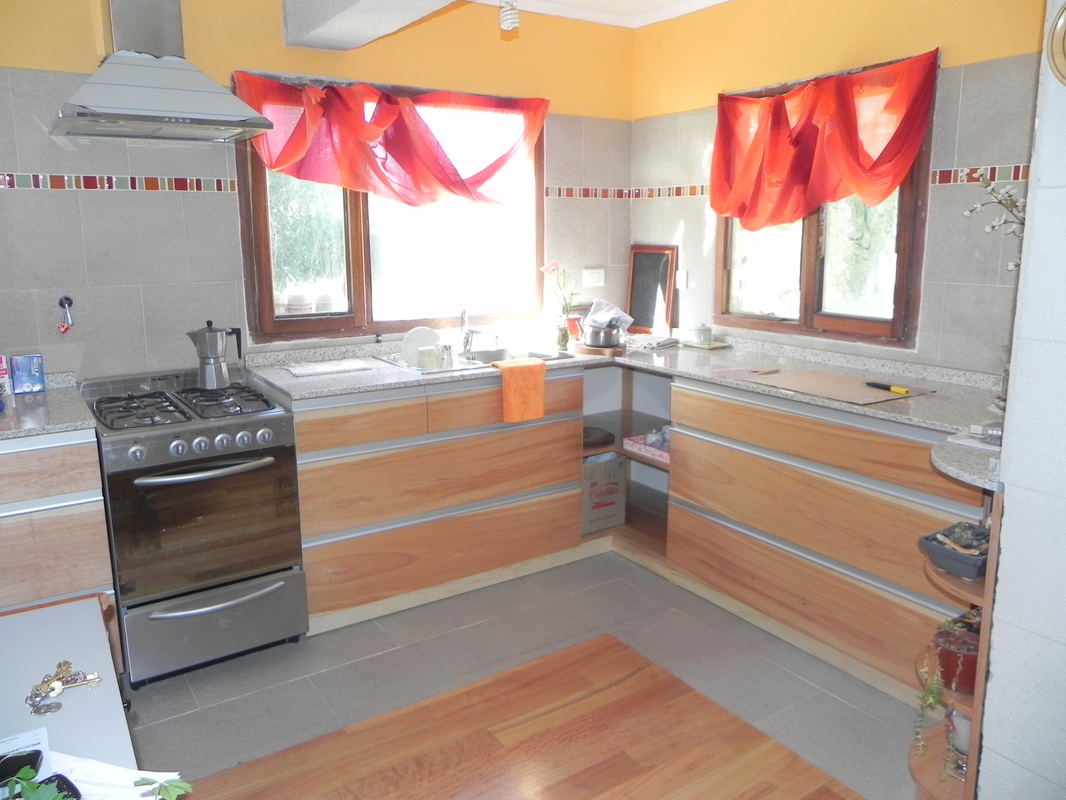
Cocina: es un ambiente bastante grande, especialmente después de decidir poner la heladera
en el lavadero. Es un lugar con bastante luz, el mueble de cocina (hecho por mi papá) tiene sólo
cajones y ninguna alacena.
• Estantes
• Luces
• Cortinas
• Terminar molduras y repintar el techo
• Repintar
• Colgar el secaplatos
• Agregar algo de “verde”?
Kitchen: its a quite big area specially after deciding to place the fridge into the laundry room. It has great light and I'm very proud of the furnishing (wich was made by my father) with no doors and no upper cabinets.
• Shelving
• Lights
• Curtains
• Finish the details of the roof and repaint the ceiling
• Repaint the walls
• Hang the dish drier
• Add some "green"?
Lavadero: este lugar es más bien un espacio funcional, y por el momento es la entrada oficial a
la casa. Contiene una mesada, la única alacena que tenemos en la casa, la heladera, ropa sucia,
alimentos, productos de limpieza, comida del gato….
• Estantes debajo de la mesada, y cortinas/puerta?
• Tabla de planchar
• Estantes en la pared
• Tapar el termotanque?
• Pintar el techo
• Colocar molduras
Laundry room: this place is sort of a useful space and for now is the entrance of the house. It has a countertop, the only cabinet in the house, the fridge, dirty clothes, food, cleaning products, cat food…
• Shelving under the countertop and curtains/door?
• Ironing table
• Shelving on the wall
• Hide the heater tank?
• Paint the roof
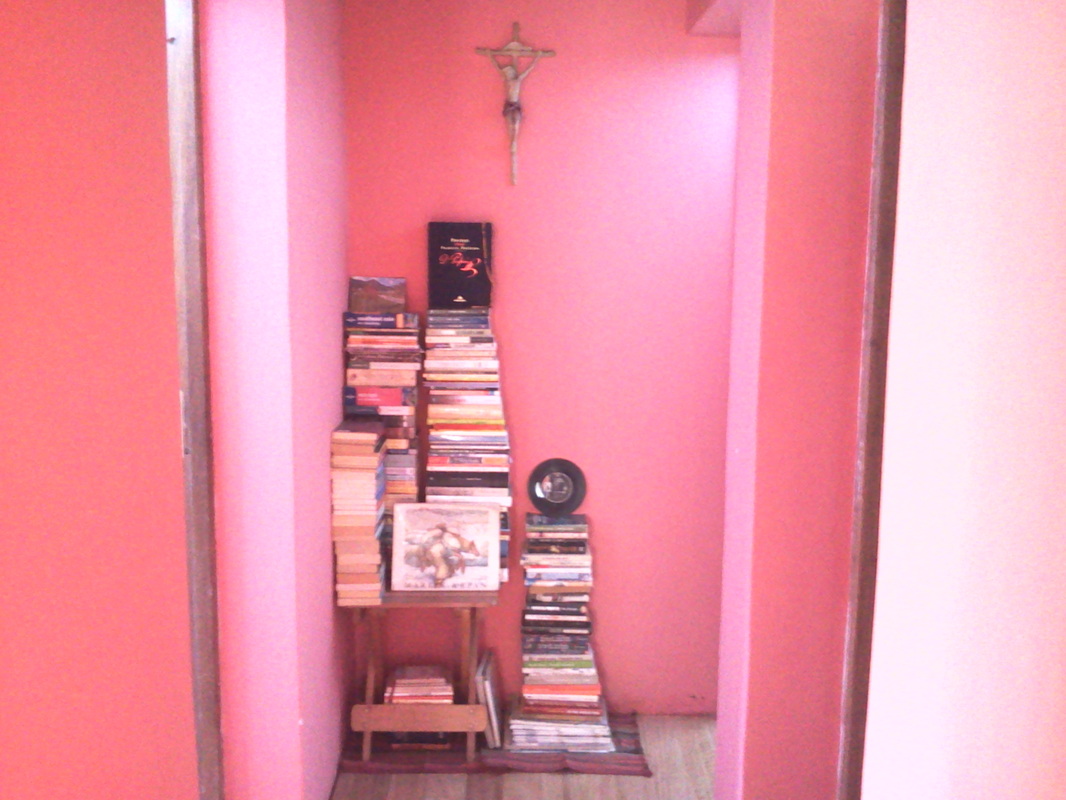
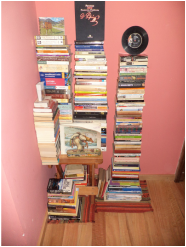
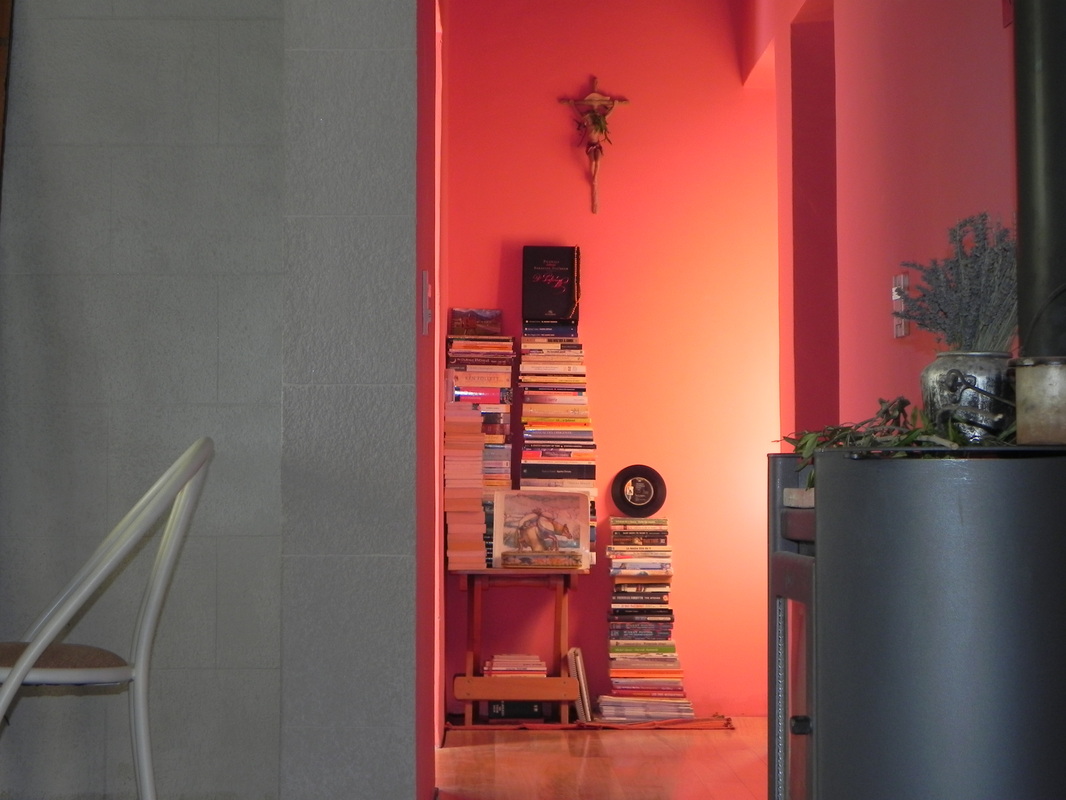
• Add moulding Pasillo: el pasillo sale de la zona del comedor y lo comunica con el baño y los dos cuartos.
Sobre una de sus paredes está apoyada la reina de la casa, la estufa a leña. Y al final del pasillo
improvisamos una biblioteca.
• Luz
• Cuadros
Hallway: the hallway starts in the dining room area and communicates it with the bathroom and both dormitories. On the longer wall leans the queen of the house: the wood stove. And in the end of the hallway we improvised some book storage space (which I like very much).
• Light
• Frames
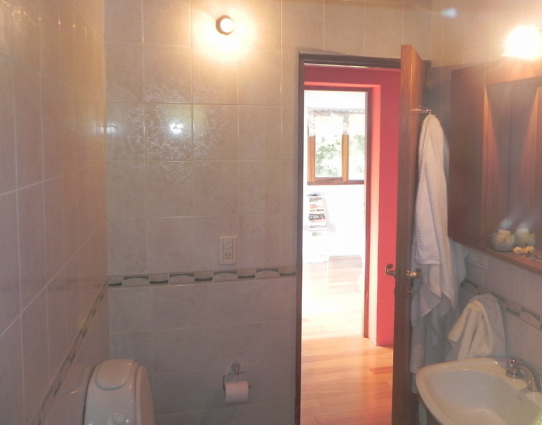
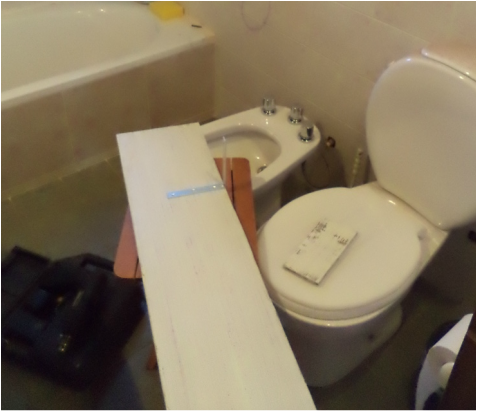
Baño: el baño fue lo primero que se (medianamente) terminó de la casa. Nosotros, además, le
hicimos un par de agregados pensando más en el futuro (bañadera).
• Vanitory?
• Pintar el mueble del espejo
• Agregar estantería o alacena
• Canasto de ropa sucia? (acá o en el lavadero?)
• Más ganchos para colgar toallas
• Repisa o canasto para sector ducha
• Cortina para ducha
Bathroom: this room was the first one to be sort-of finished while building the house. We added the bath tub (thinking in the future).
• Vanitory?
• Paint the mirror cabinet
• Add shelving or cabinet
• Add laundry basket? (here or in the laundry room?)
• Add hooks for towels
• Shelving in the shower area
• Shower curtain
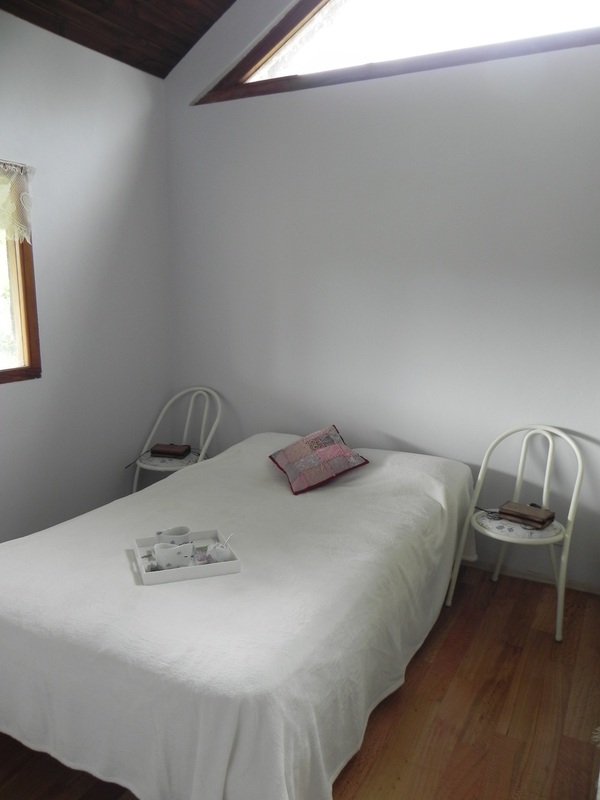
Dormitorio principal: este espacio es transitorio, por eso el placar fue preparado de tal forma que pueda desmontarse y adaptarse a sus futuras funciones. De todas maneras queremos agregar un par de cosas para que el lugar se sienta más cálido:
• Colgar mesas de luz (si, colgar! Ya verán…)
• Agregar una cómoda
• Cambiar cortinas del placar y agregar cortinas a la ventana
Master bedroom: this room is transitory, so the closet was built so it can be easily removed when it changes in the future. On the other hand, this transition won’t be that short, so we want to add some items to make a more comfy place:
• Hang the night tables (yes, hang! You’ll see…)
• Add dresser
• Change the curtains of the closet and add curtains for the window
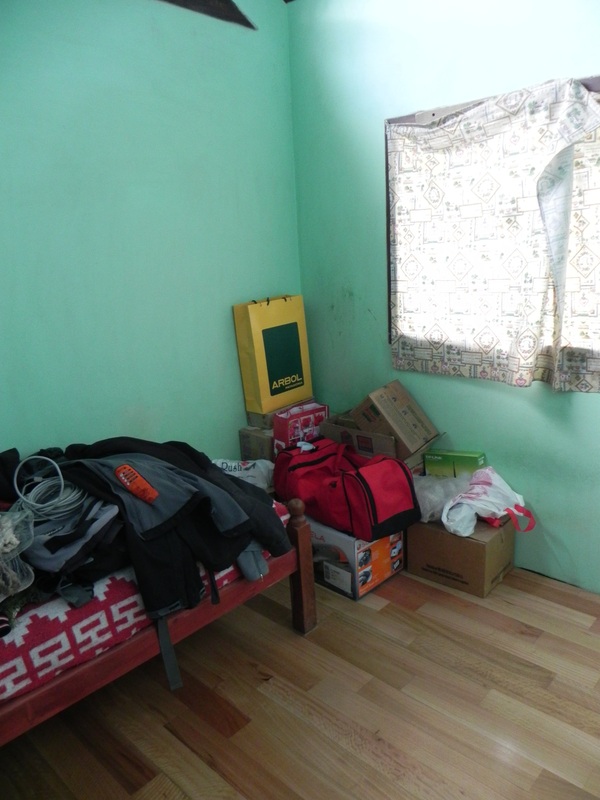
Dormitorio para invitados: este cuarto es una mezcla de cosas: depósito de todo lo que no tiene lugar, tiene una cama para invitados y una cómoda, lo usamos como oficina también…
• Agregar espacios de guardado, estantes y escritorio
• Buscar alguna forma de organizar las cosas del lugar
• Pintar las paredes
• Pintar la cama y la cómoda?
• Terminar de machimbrar el techo
• Hacer armario
• Pensar cómo terminar el 2º piso: usos, piso, paredes, escaleras para acceder
Guest room: this room is a mix of things: is where we put everything that has no place yet, it has a guest bed and a dresser, we use it as an office as well…
• Add storage space, shelving and desk
• Find a way to organize it
• Paint walls
• Paint bed and dresser?
• Finish roof
• Closet
• Think of ways to finish the 2º floor: uses, flooring, walls, staircase to access
General: hay varios trabajos que son generales para toda la casa:
• Zócalos
• Transiciones entre curators
• Luces
General: there are some general jobs applicable for the entire house:
• Skirting
• Transitions between rooms
• Lighting fixtures
Fue un post largo, pero aún así creo que muy resumido. Cuando vayamos actualizando cuarto por cuarto ampliaré.
This was a very long post, but I still think that it was only a summary. When we update each work done in each room, I'll write more.
Bussi!
Abajo pueden encontrar las manualidades como fueron incorporadas el día de nuestro casamiento. Estoy muy contenta con el resultado!
Below you may find pictures of our wedding day with all our DIY-ing incorporated. I'm very happy with the results!
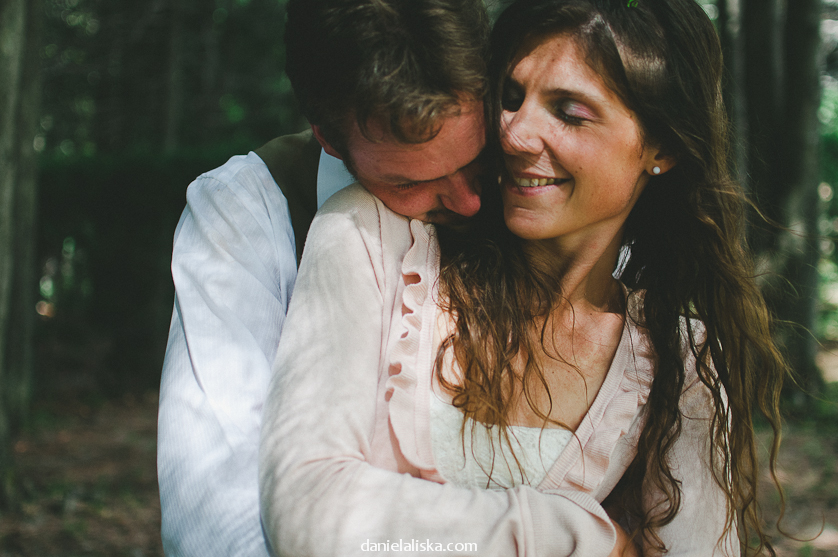
Ya los próximos postst volvemos con la aventura de la casa! Por último una foto de nosotros dos!
We will be coming back with posts of the adventures in the house! And lastly, a picture of both of us!
Bussi!
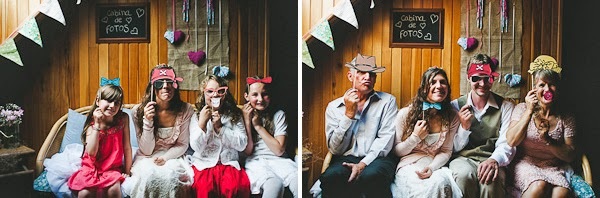
Estuve esperando a que pase el gran día para poder también compartir un poco las cositas que armamos para esta ocasión. Habrá cosas bien ligadas al diseño, pero seguro que se escapan cuestiones que son bien personales, lo cual es inevitable… Ante todo, y quizás un poco a modo de consejo-si puedo-, quiero recalcar la importancia de dos grandes decisiones: 1. Haber decidido tener un largo compromiso (17meses). 2. Haber insistido en que todo lo que suceda ese día nos refleje como pareja. El hecho de que el compromiso fuera largo nos dio tiempo de decidir qué “tipo” de evento queríamos (más sobre eso aquí y ver qué cosas podíamos construir/elaborar nosotros mismos, lo que nos lleva al 2º punto: lo que hicimos fue lo que nos reflejó, hizo que el día fuera “nosotros”… La realidad es que primero elegimos cómo queríamos que fuera ese día y con esa idea buscamos: lugar, vestimenta, accesorios… De a poco fuimos haciendo “manualidades” en nuestro tiempo libre y como las hicimos con mucho tiempo de anticipación puedo decir felizmente que llegó la semana anterior al casamiento y, exceptuando los trámites que si o si hay que hacer a último momento (ej: civil), no había más nada que hacer…aunque admito que eso también tiene que ver con haber elegido un lugar donde la gente se encargaba de preparar todo (gracias Dahiana y Juan!). La consigna para ellos fue: nosotros armamos “esto” y ustedes armen el resto de forma acorde.¡ Y puedo decir que lo hicieron genial! I was waiting for the big day to go by to share the little things we did for the event. Some of thethings will be design-related, but other may be personal, which is inevitable…First of all, and –if I may- also a piece of advice, I want to stress the importance of two bigdecisions:1. The decision of having a long engagement (17 months).2. The decision of insisting that everything happening that day be a reflection of us as acouple.The fact that the engagement was long gave us time to decide what “type” of event we wanted(more of that here) and see what we could do/build ourselves, which takes us to point number 2:what we did was a reflection of us, that made the day scream “us”…The thing is that we first chose how we wanted that day to be and with that idea we went lookingfor vendors, outfit, place…Little by little we started DIY-ing in our free time and as we started early I can say that the weekbefore the wedding we were free of DIY-work, we just had to do the things you usually do the weekbefore (eg: paperwork). I have to admit though that the people of the venue (thanks Dahiana andJuan!) were the one to give the final touches that weekend. The task for them was: we preparedand DIY all “this”, you should complete the decorations accordingly. And I can say they did it great!Volviendo a lo nuestro, hagamos una recapitulación de nuestras creaciones, teniendo en mente el eje: rústico-pic nic-sencillo-silvestre. Going back to our thing, let’s do the recap of our creations bearing in mind our axis: rustic, pic nic,simple, natural.a. Invitaciones: usamos tela arpillera con unos detalles de cinta bebé y encaje para mostrar sutilmente la informalidad del día y las invitaciones fueron impresas en forma casera con un template bajado de la web. a. Invitations: we used burlap with details of lace and ribbons to show in a subtle way theinformality of the day and the paper invitations were home-printed and designed with aweb template.b. Antifaces y decoración para cabina de fotos: para este espacio cosí unos banderines y unos
colgantes de tela, además de los aclamados antifaces.
b. Photo props and decorations for the photobooth: for this space I sew some bunting and some hanging figures, besides of the loved props.
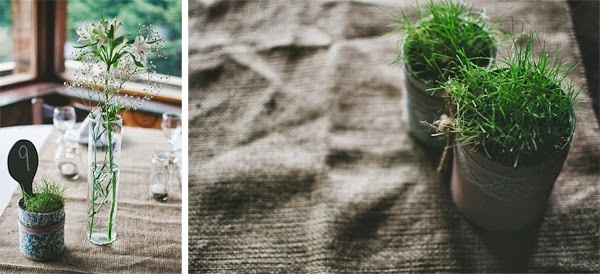
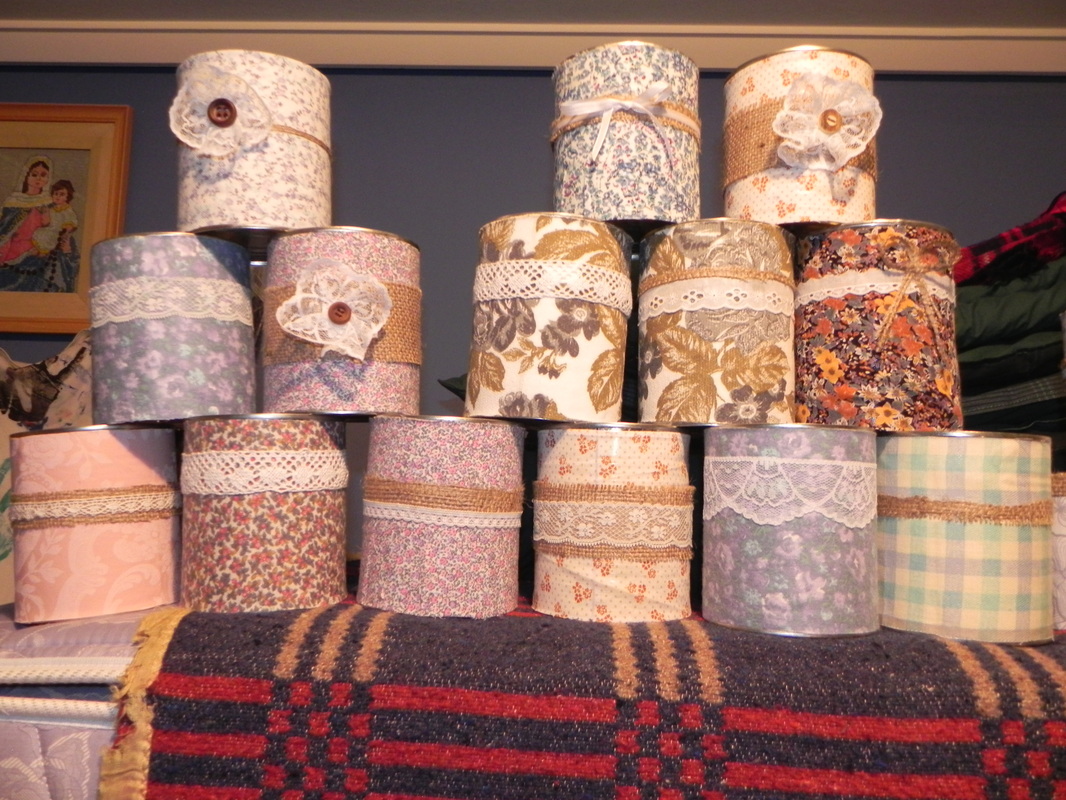
c. Macetas: con latas forradas con telas y cintitas armamos unas pequeñas macetas donde
plantamos pasto. Algunas de ellas fueron usadas para identificar el número de mesa.
c. Flowerpots: I had collected some tins and glued fabric and other details on them. Some of them were used to identify esch table.
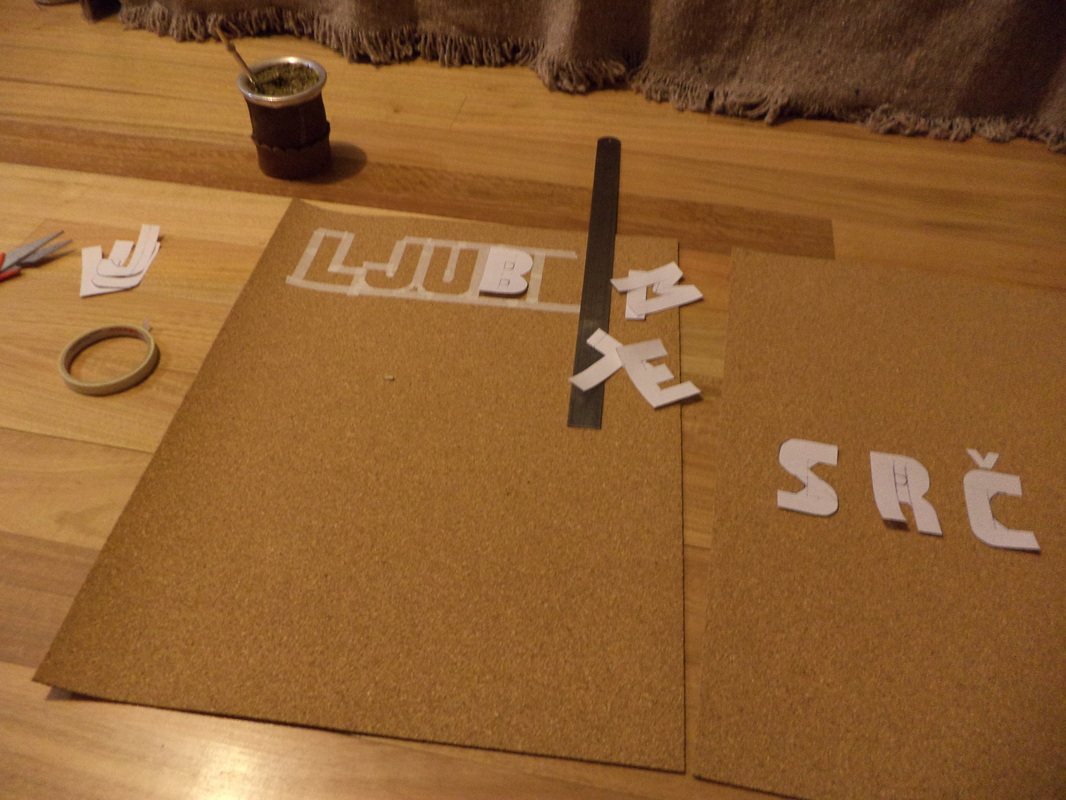
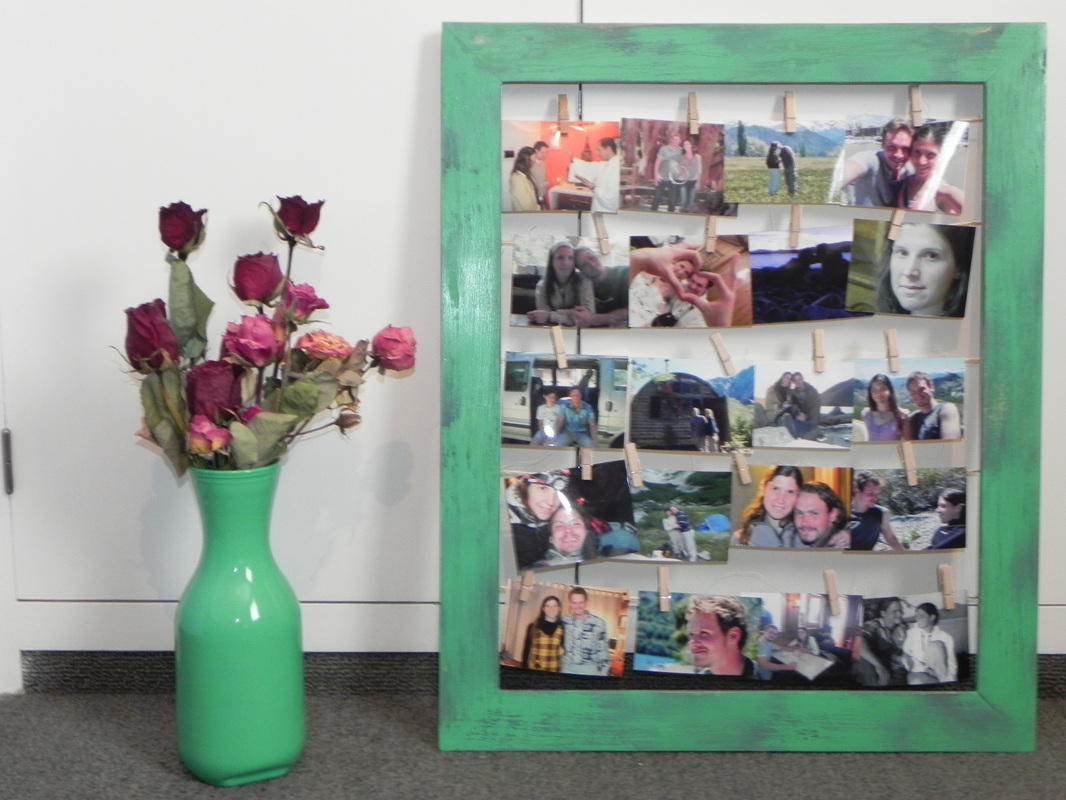
d. Fotos: armamos un marco y colgamos fotos de nuestro noviazgo y, por otro lado,
preparamos una soga para colgar fotos nuestras de pequeños.
d. Photos: we prepared a frame and hanged photos from our time toghether and we also had a sort of rope were we hung photos from our childhood.
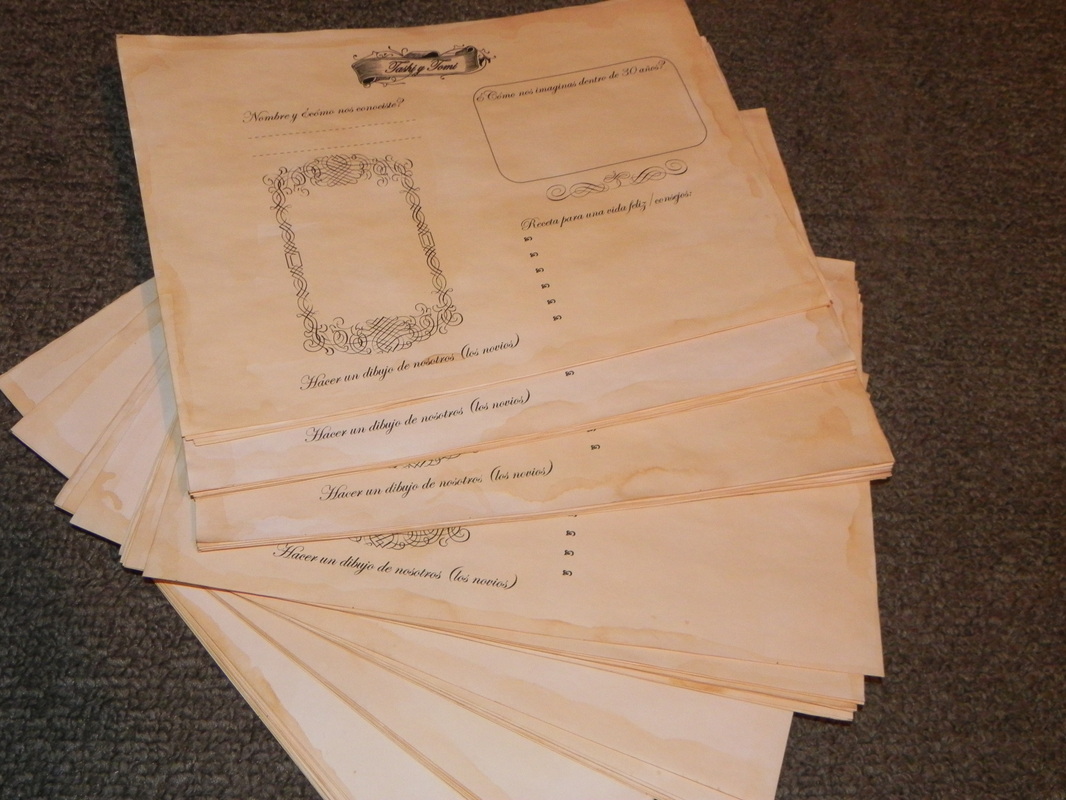
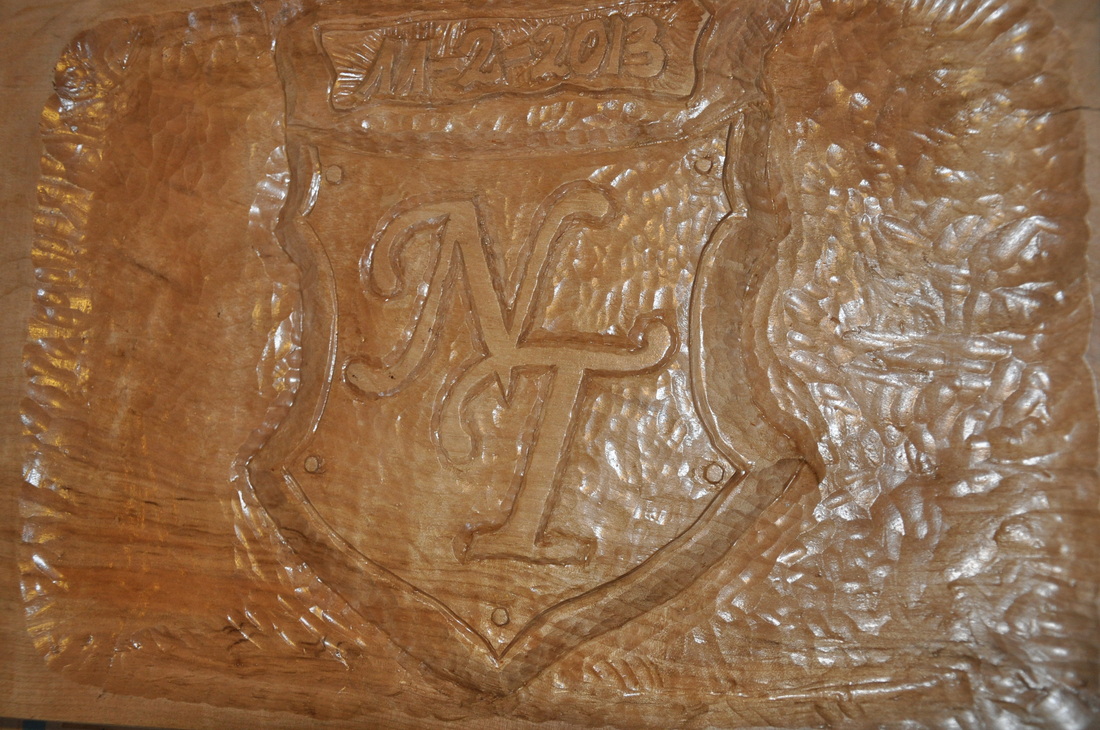
e. Libro de firmas: las hojas fueron “envejecidas” usando té, el diseño así como la impresión
de las hojas fueron hechas de forma casera. Las tapas fueron de diseño y realización del
novio y su hermano.
e.Guestbook: the ancient-look of the paper was done with tea, the design and the printing
was home made. The covers were designed and carved by the gom and his brother.
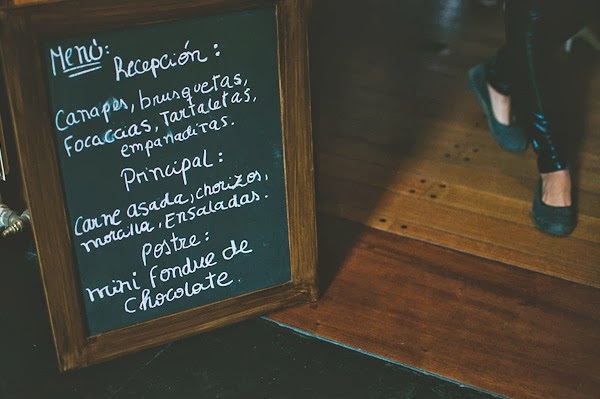
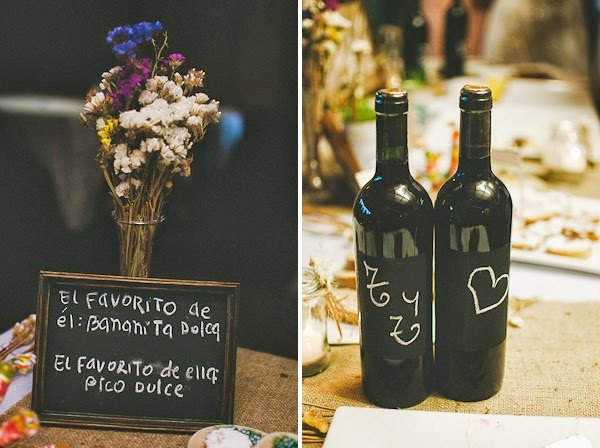
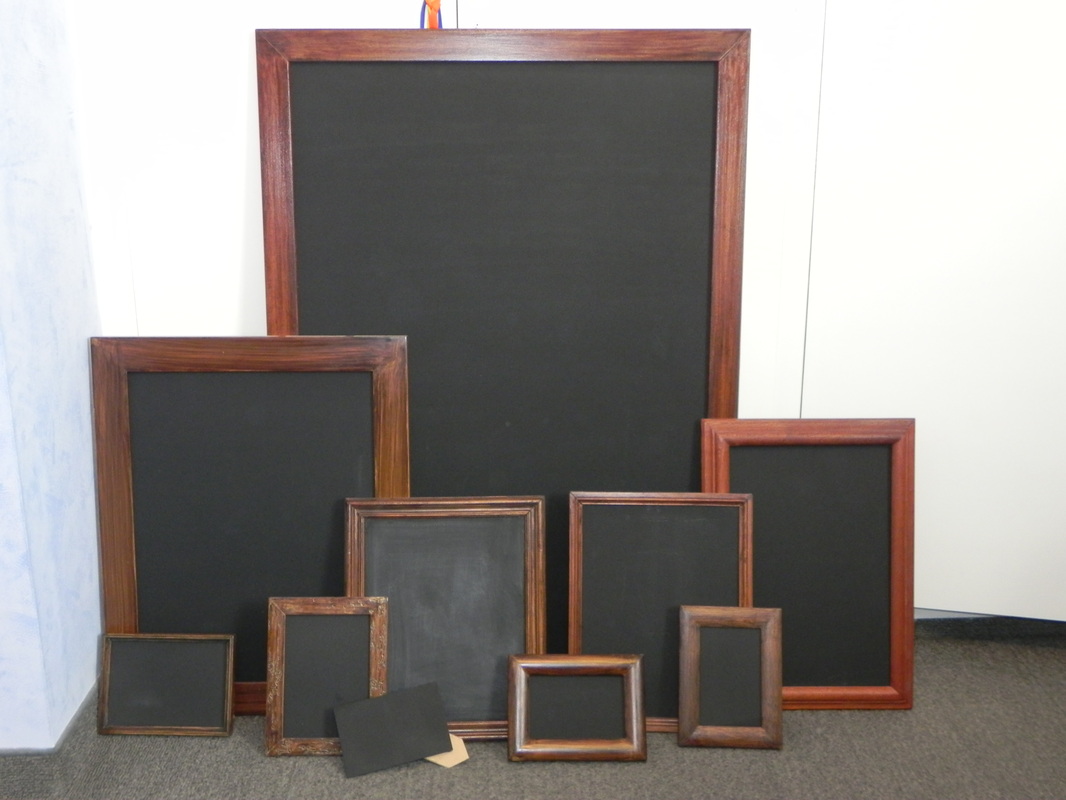
f. Pizarrones: armamos varios, algunos indicaban el menú, el orden de las mesas, la cabina
de fotos y otros, en forma de paleta de ping pong tenían escrito el número de mesa.
f. Chalkboards: we p repares several of them. On them was written: the menu, the seating charta, indications such as photobooth, and there were some ping-pong-bat-shaped chalkboards indicating the number of the table.
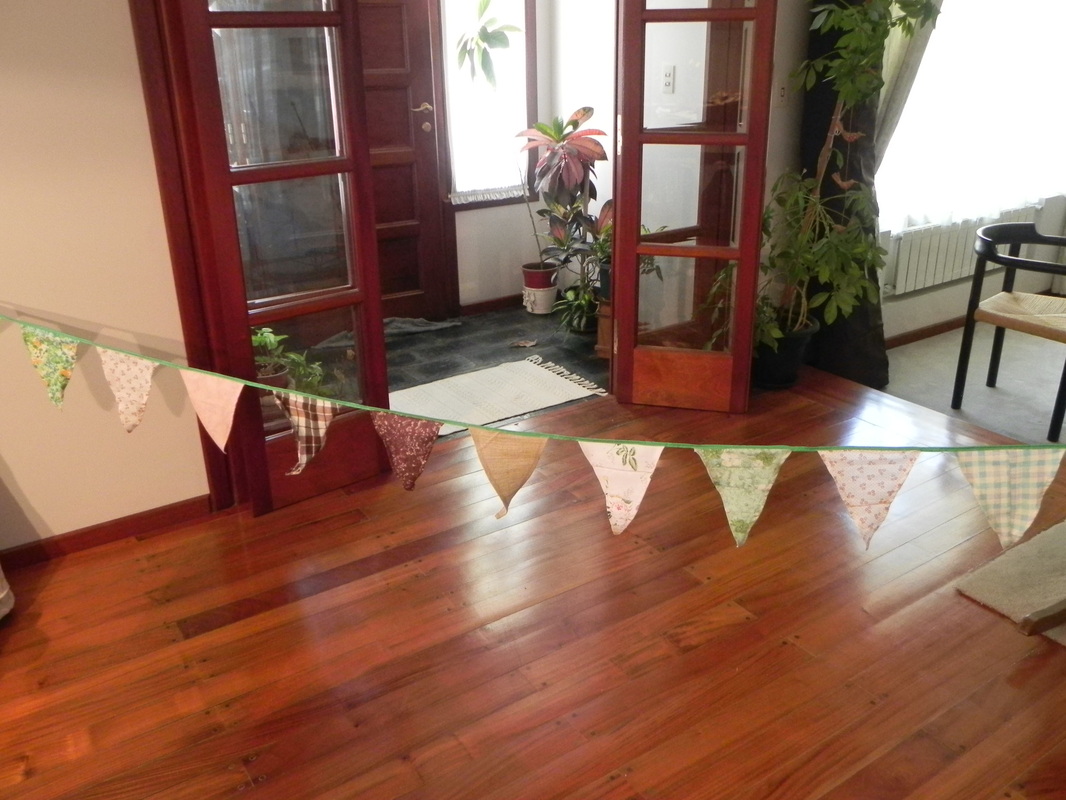
g. Banderines: cosí varios banderines para colgar donde estuvieran las mesas para dar más
un aire de pic-nic e informalidad.
g. Bunting: I sewed several of them to be hanged were the tables would be to accent the picnic and informal atmosphere.
Más adelante publicaré las fotos del día del casamiento (¡ojalá que lleguen pronto!), con todas
estas cosas incorporadas y en conjunto con todo lo que prepararon en la hostería.
In another post I will publish photos of these things used in the wedding along with everything that the people from the hotel added.
Bussi
|


 RSS Feed